
I bought this kit from China a while ago, never got time to put it together, so this time I try to assemble this calculator. Interesting features about this calculator is, of course we can use it as an ordinary calculator, plus some special features for converting hex to decimal and decimal to hex, and also can use for calculate and identify resistor color codes and values.
Enough about the features, lets see what is included in the package.
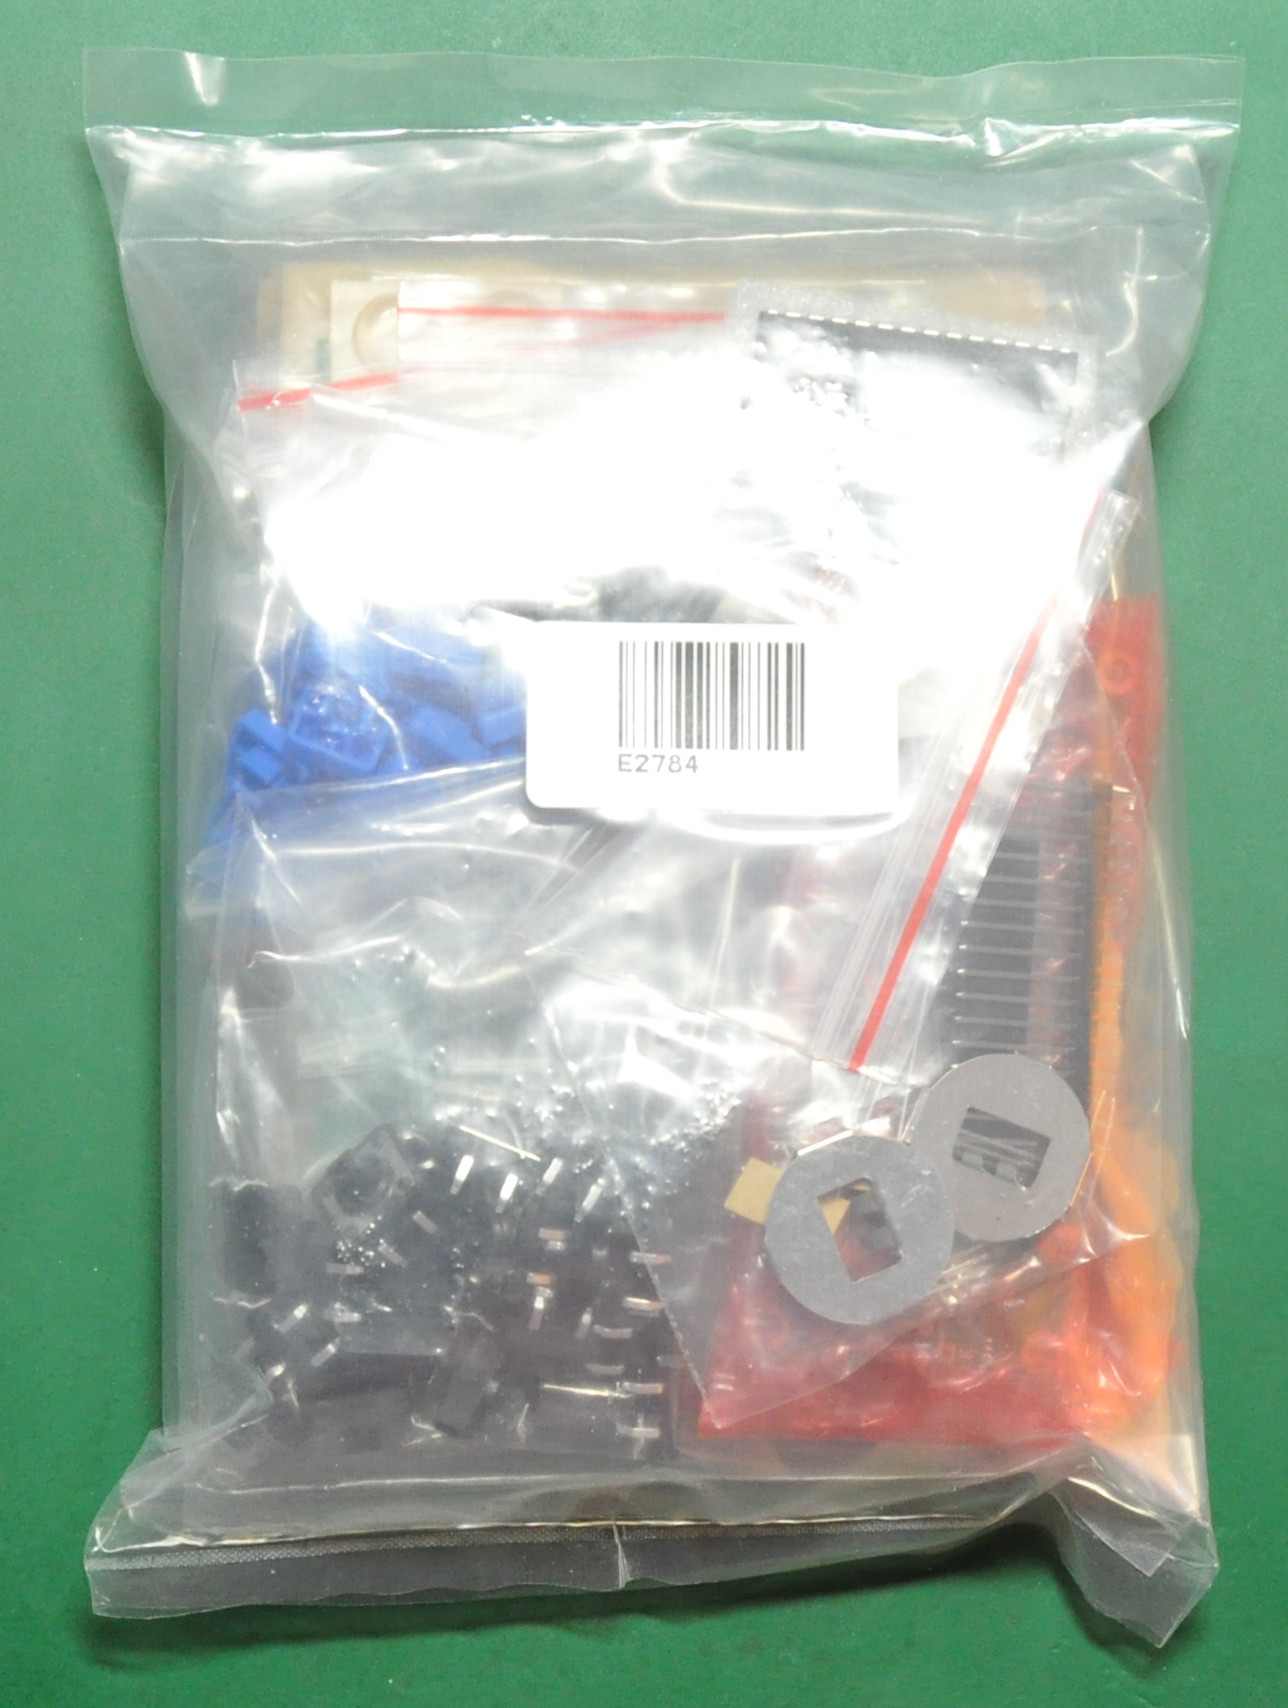
Above is the package that I received. Looks like it’s include everything that we need to assemble this calculator and the case. Lets unboxing the kit.
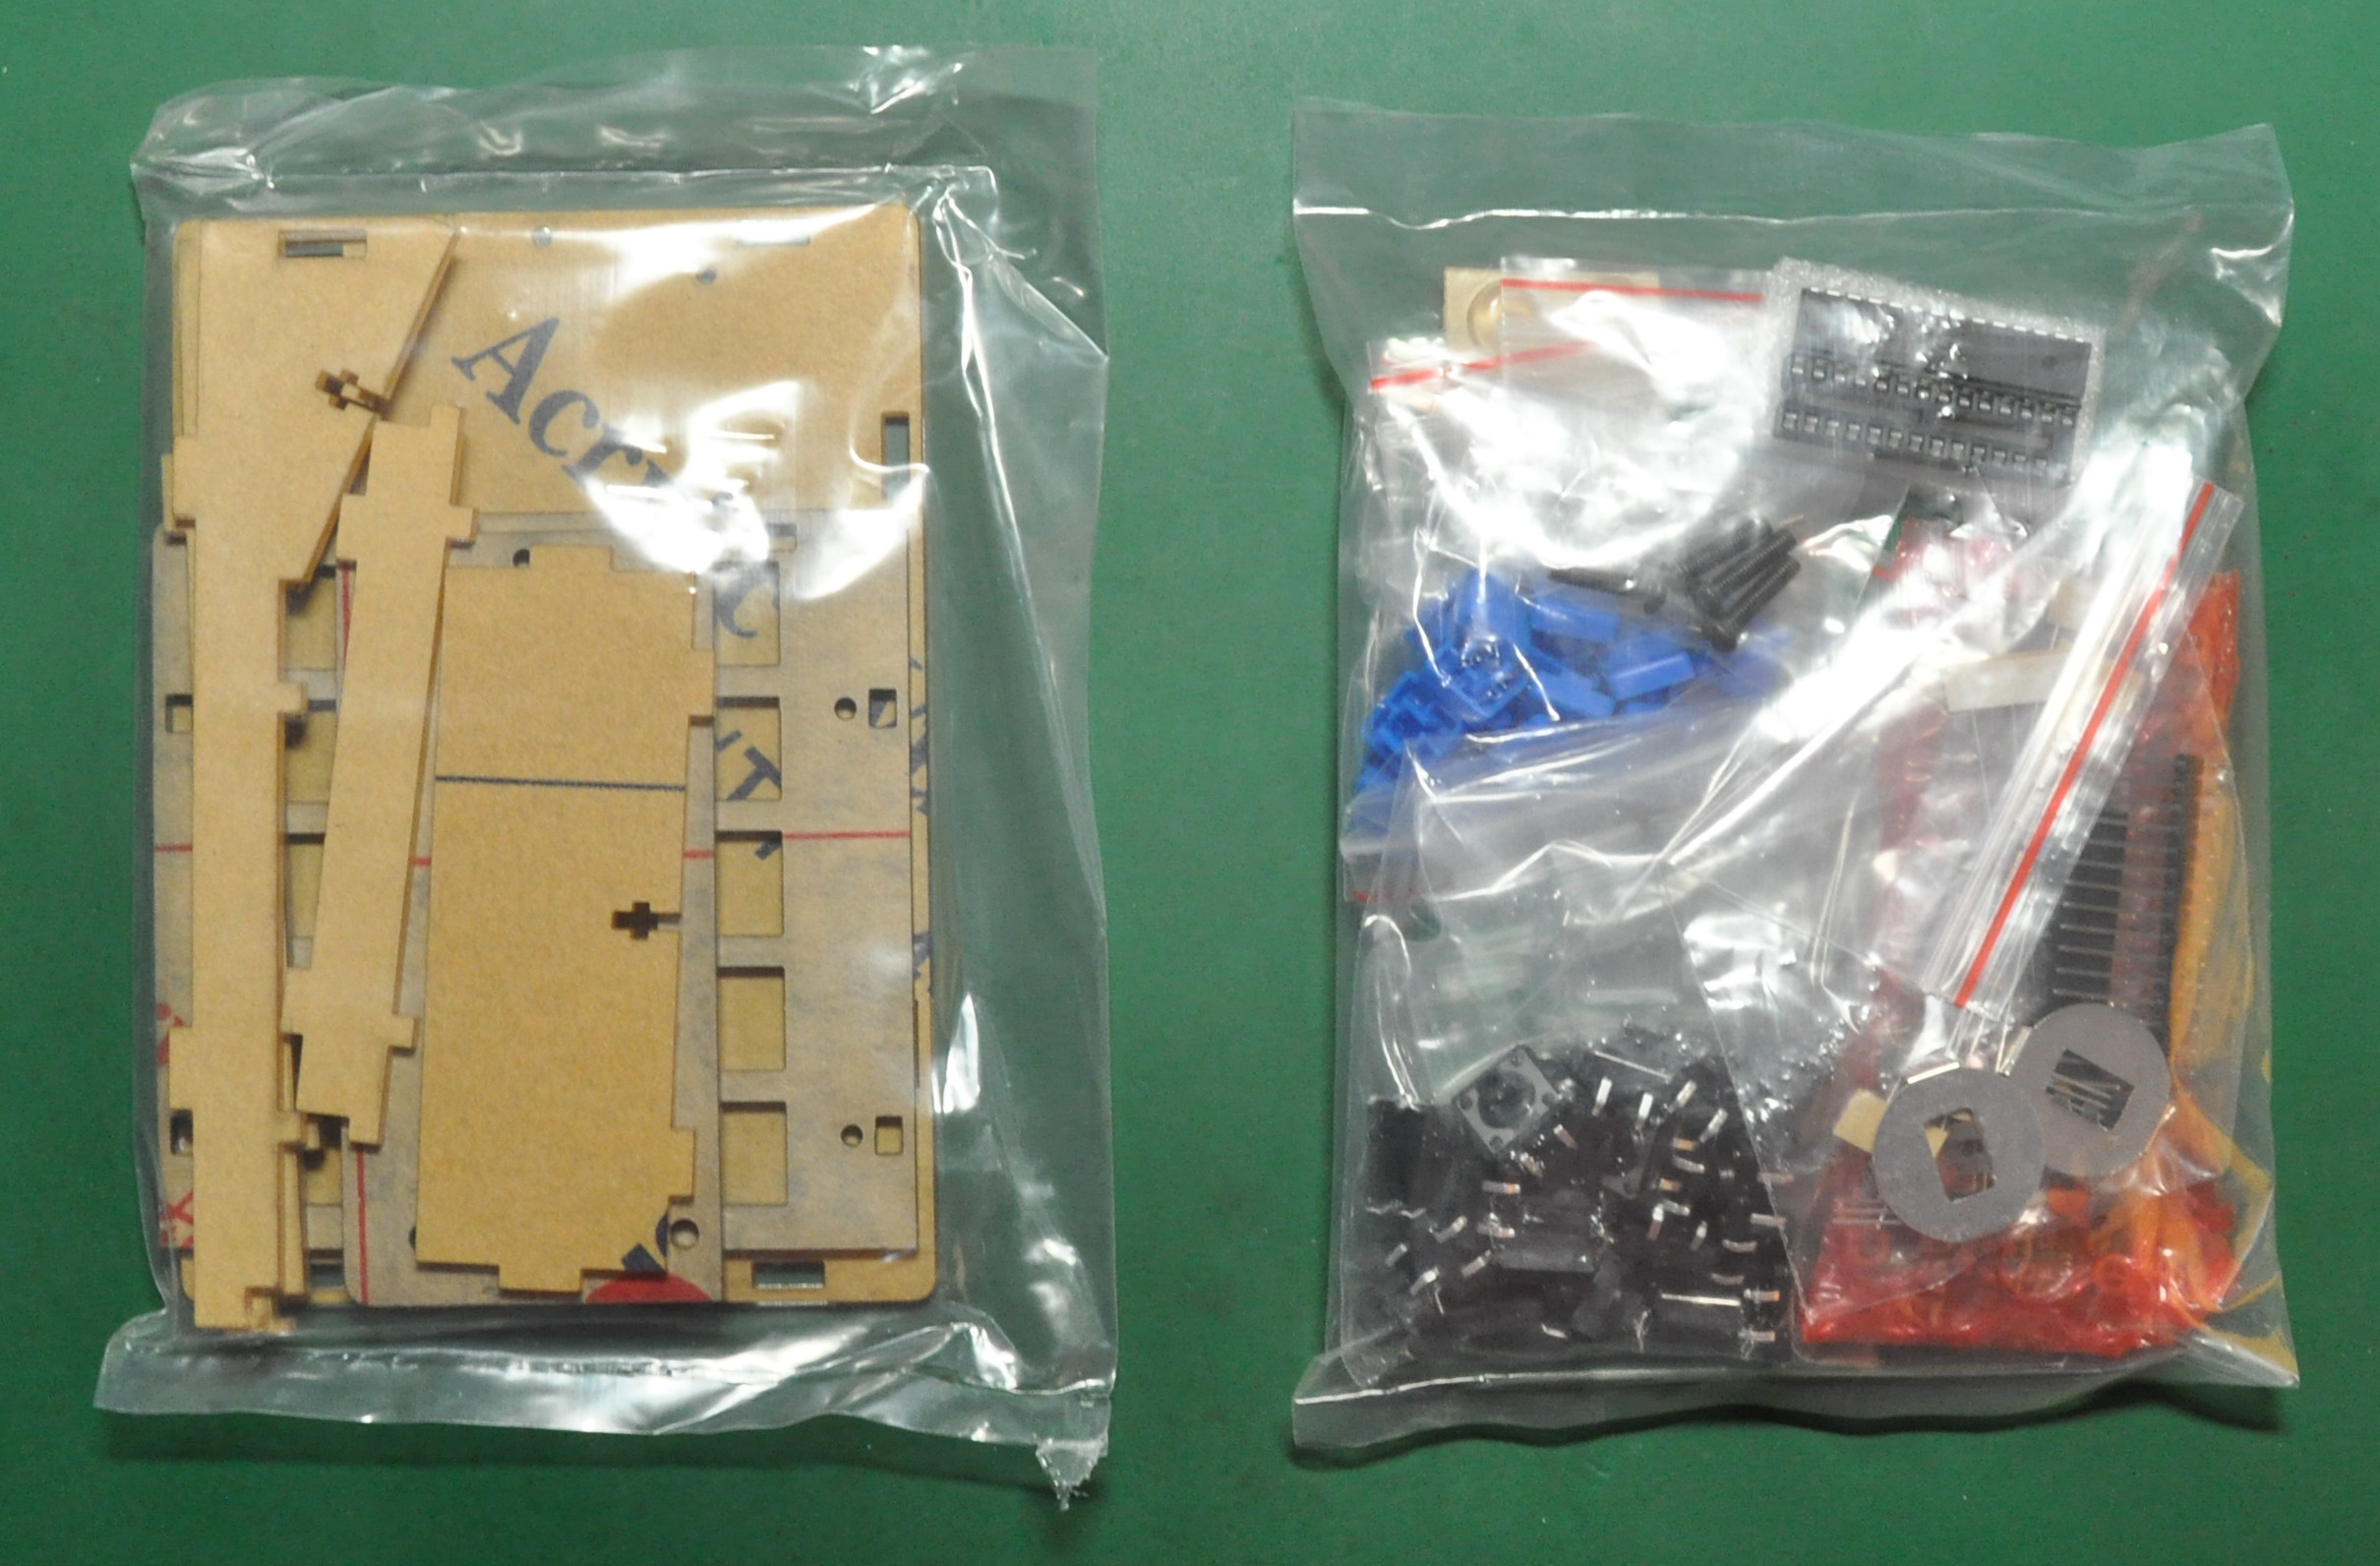
After opening the package, we can see that the parts divided into another two plastic packages, that is the PCB part and the acrylic case part. I want to give 5 star for the well packaged kit like this.
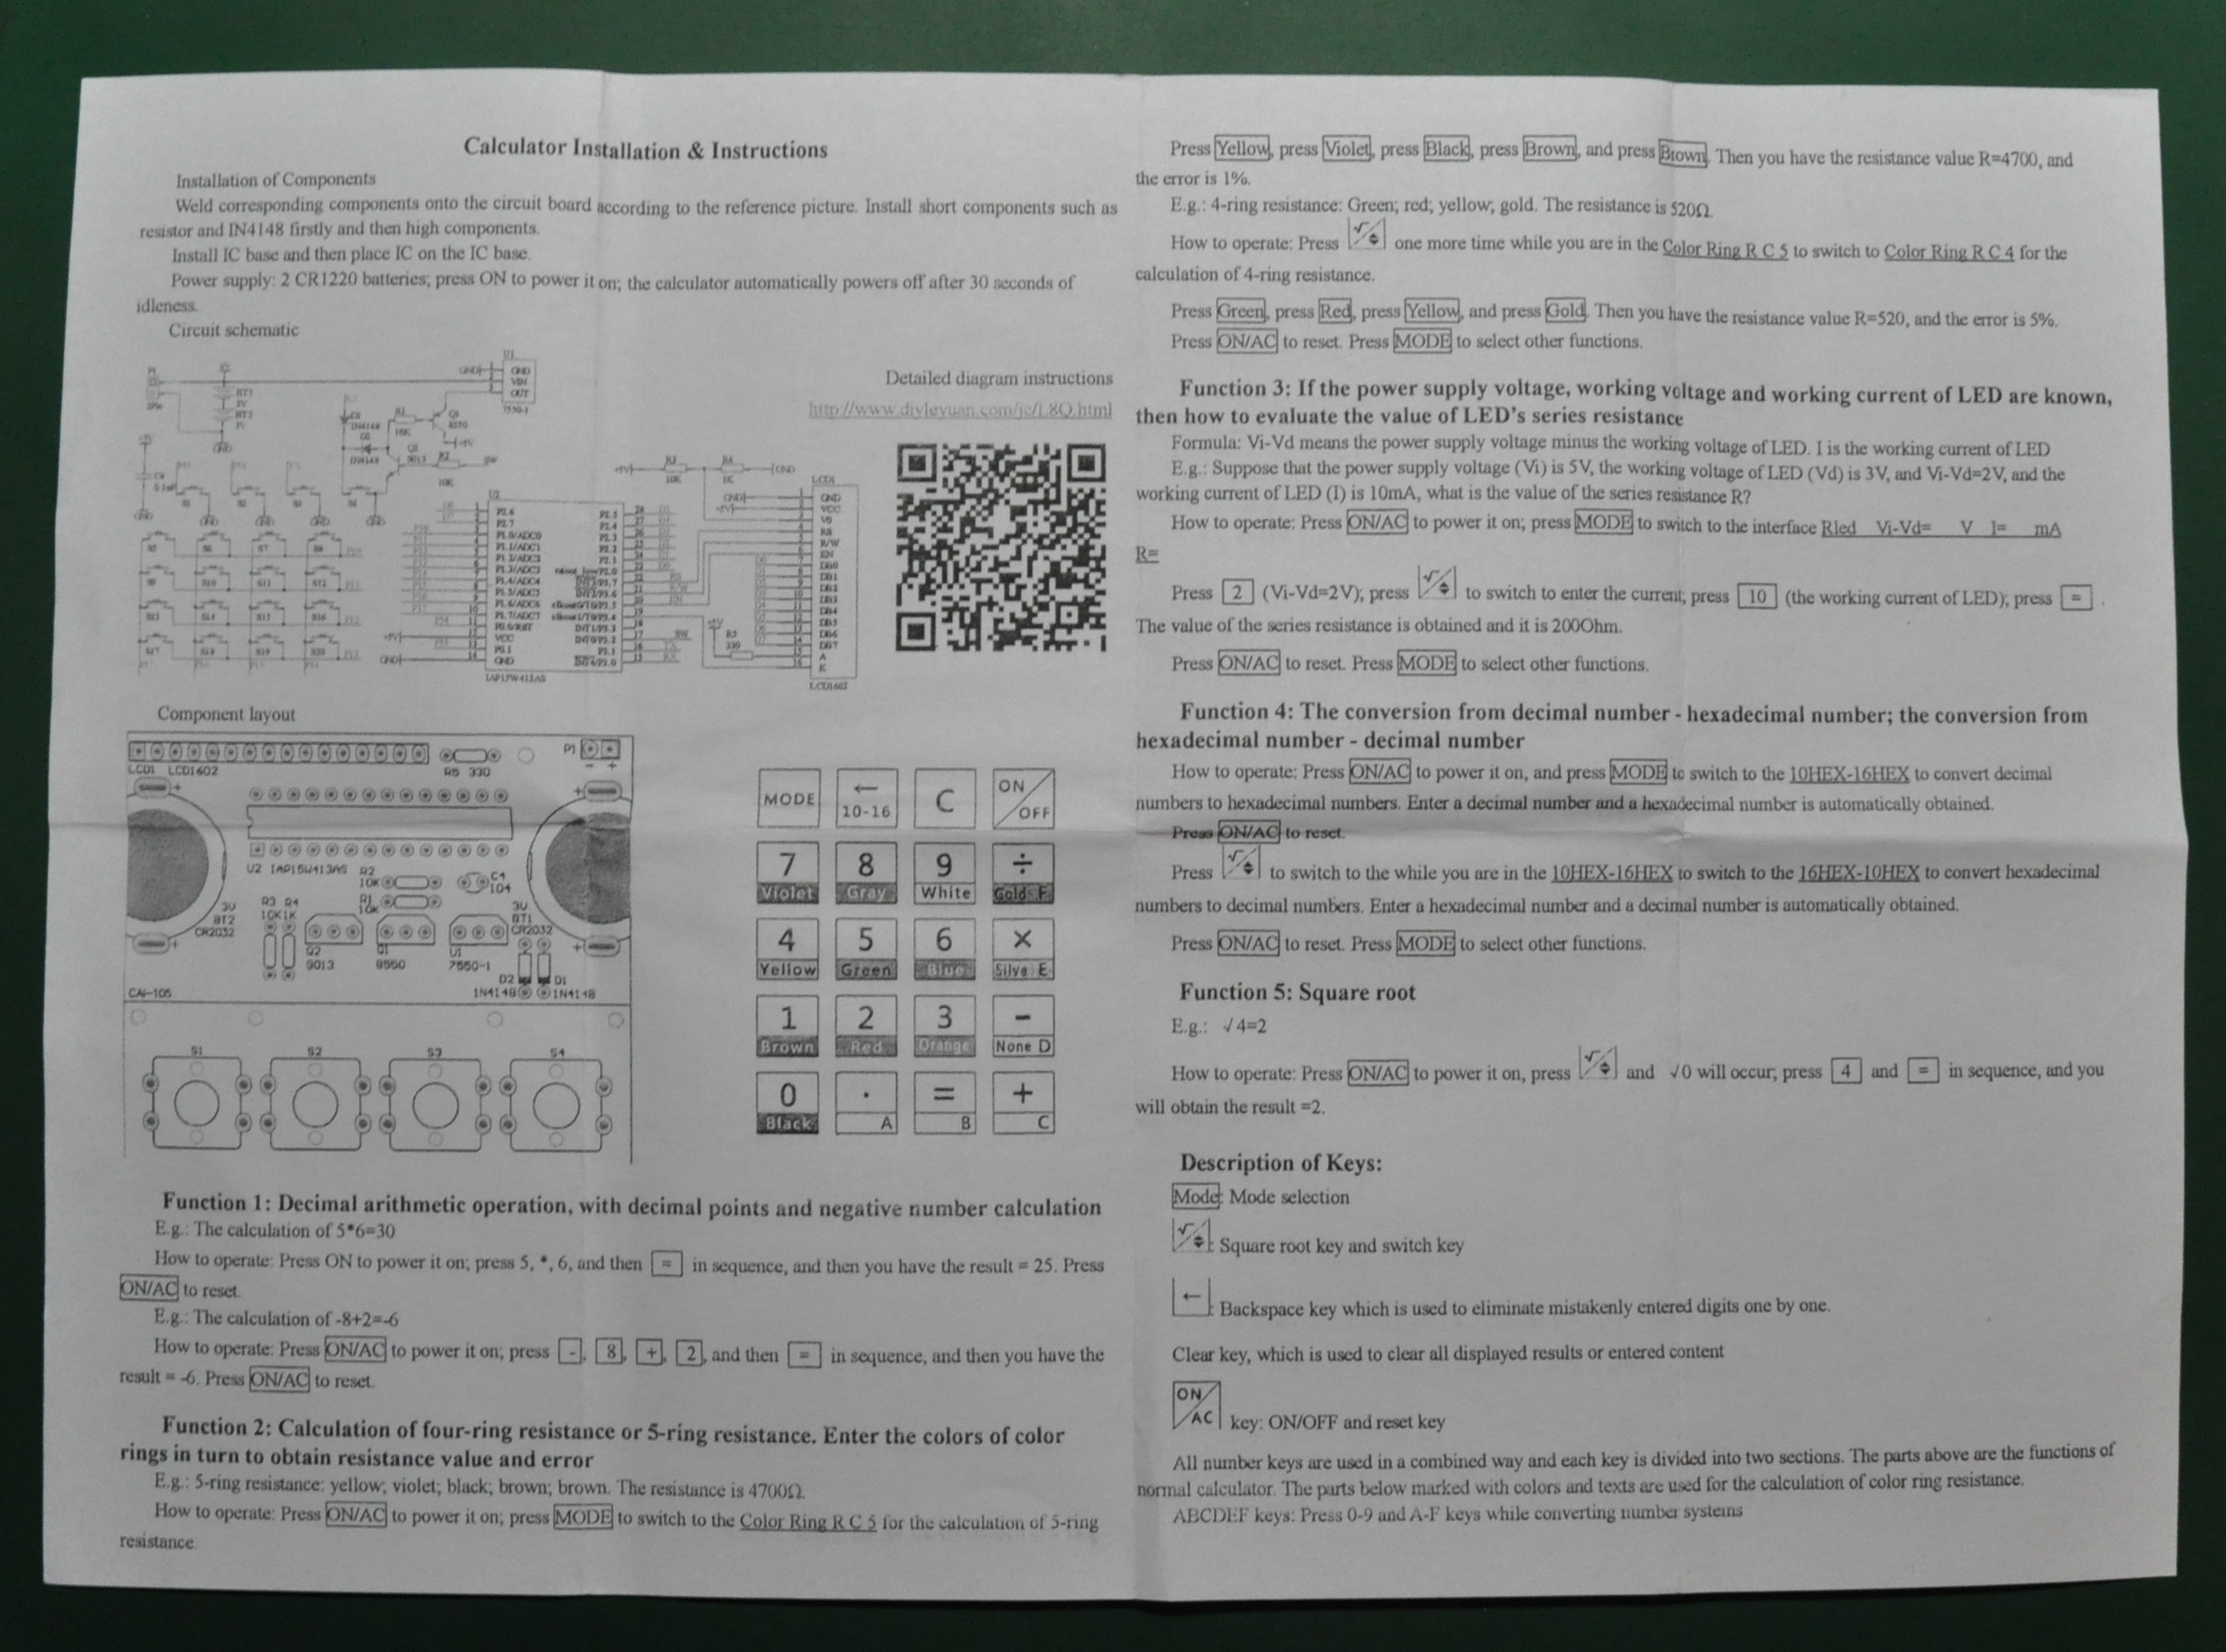
Not much info but a simple instructions included. Let’s open the PCB main part first.
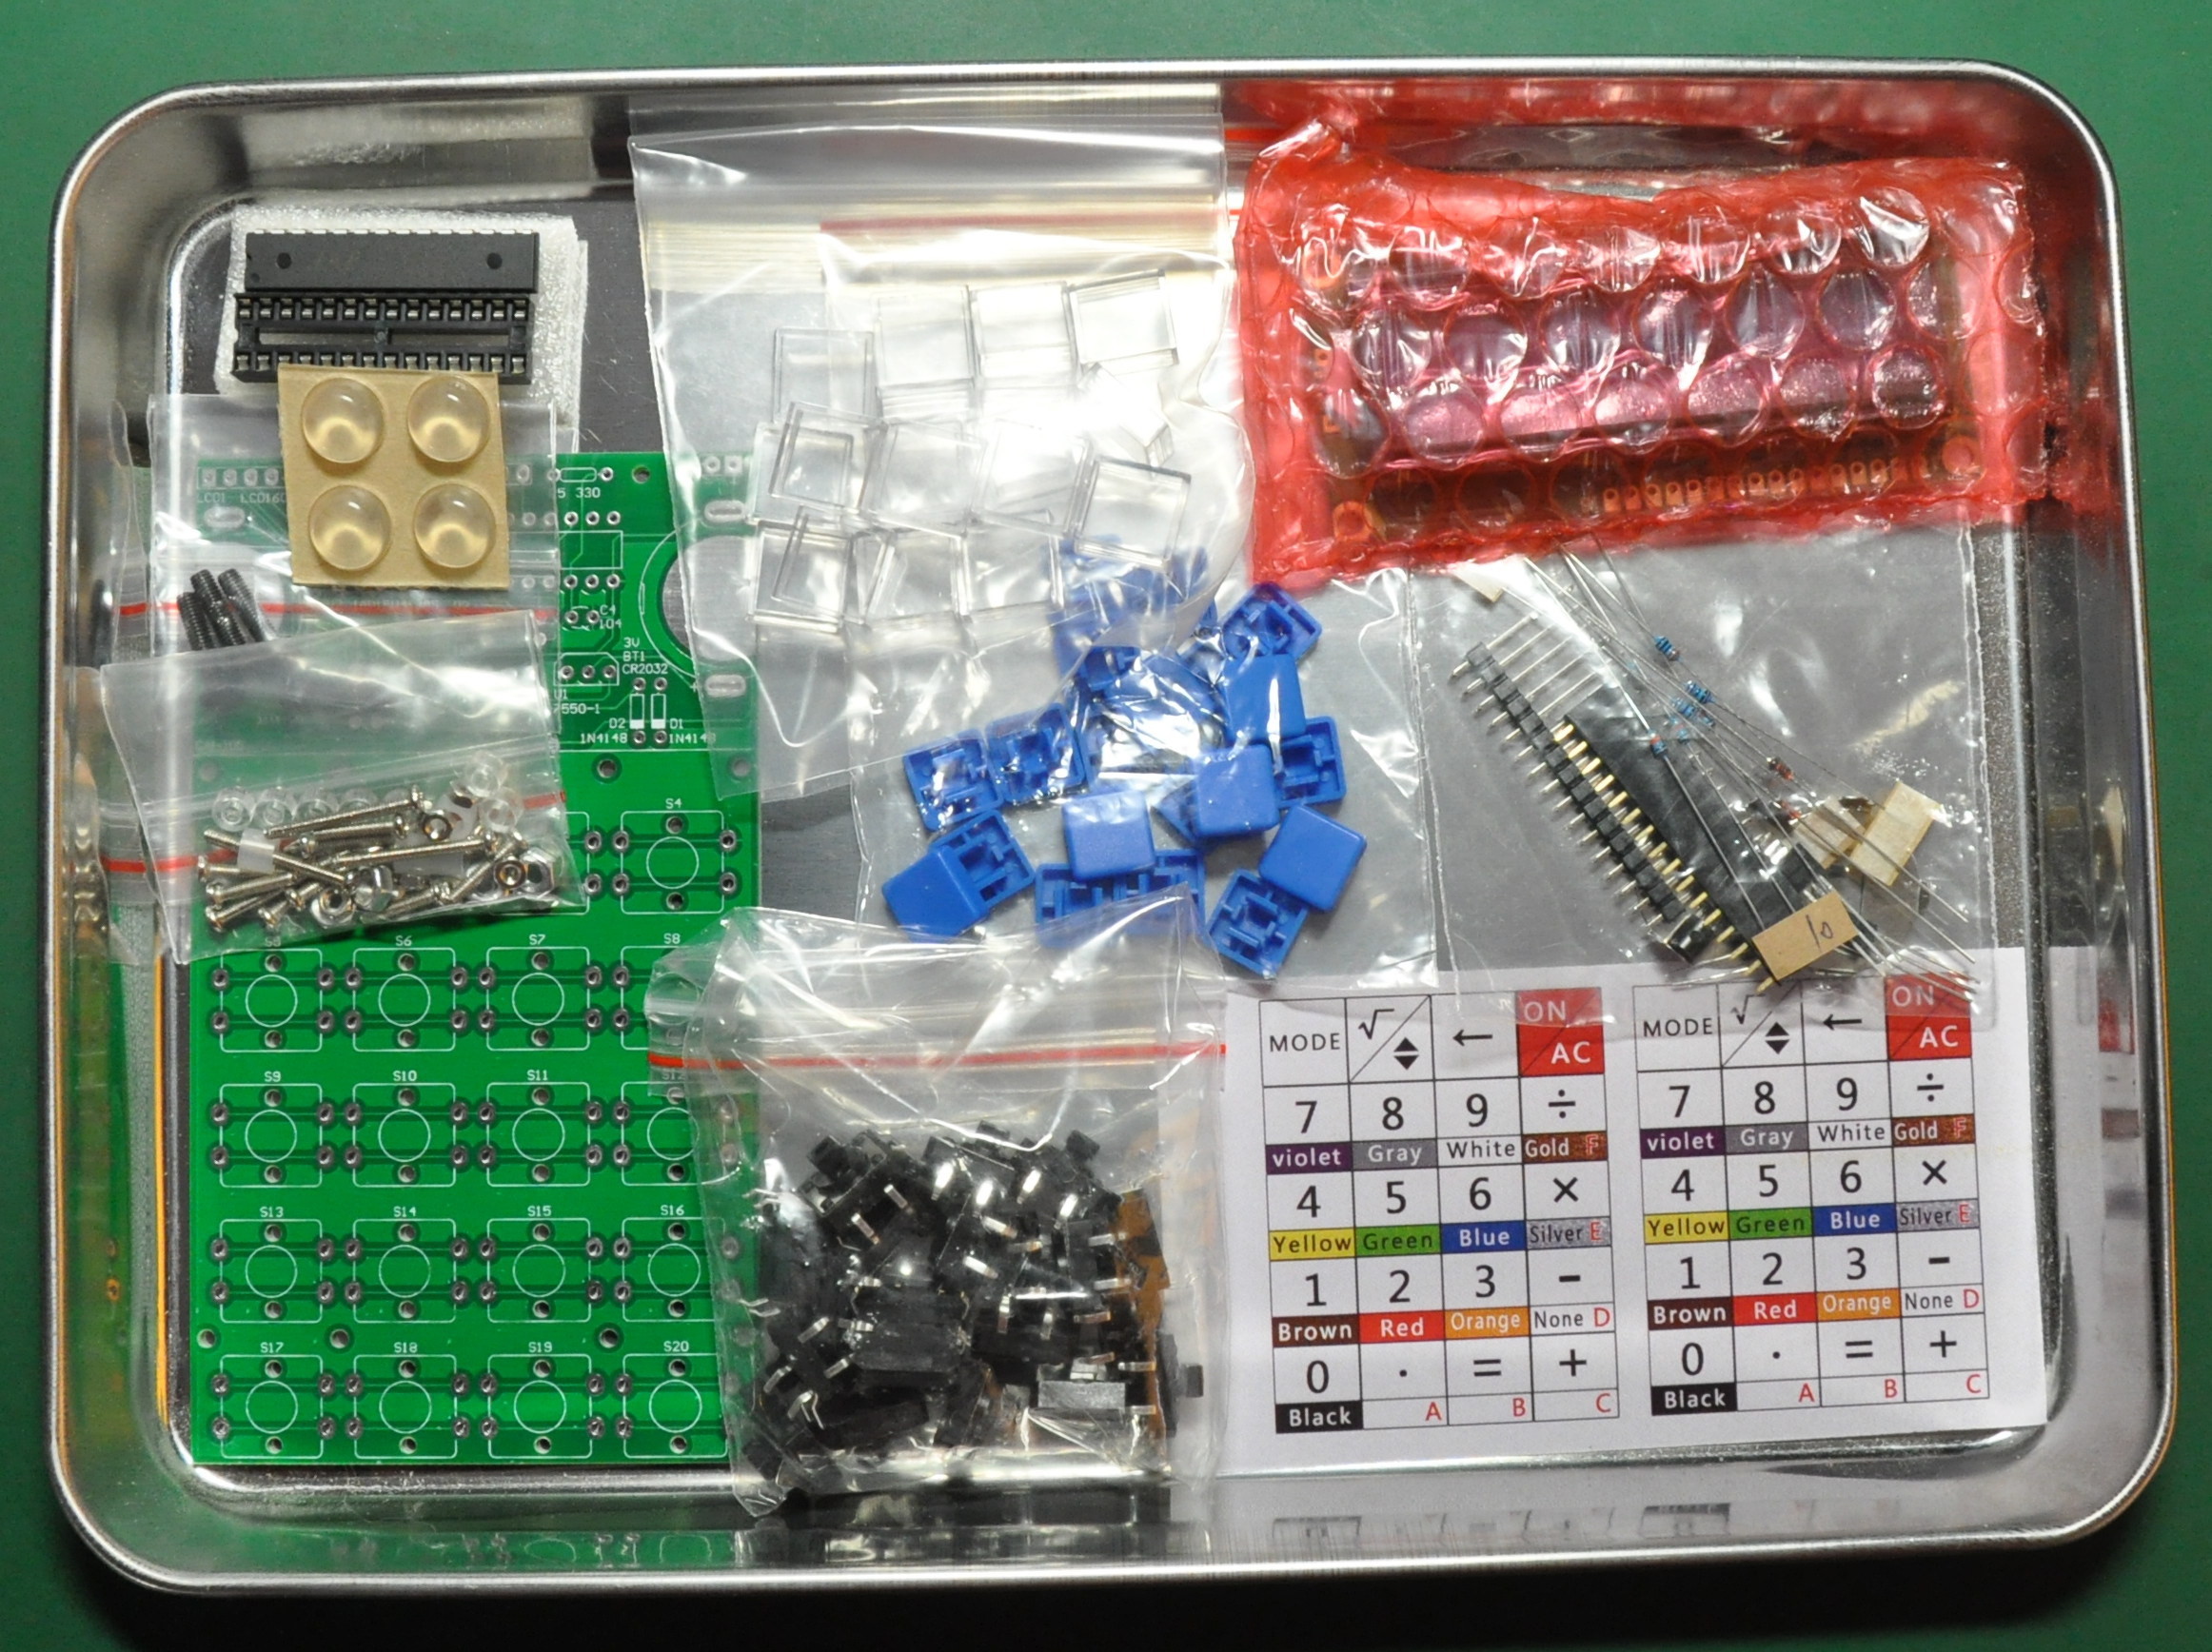
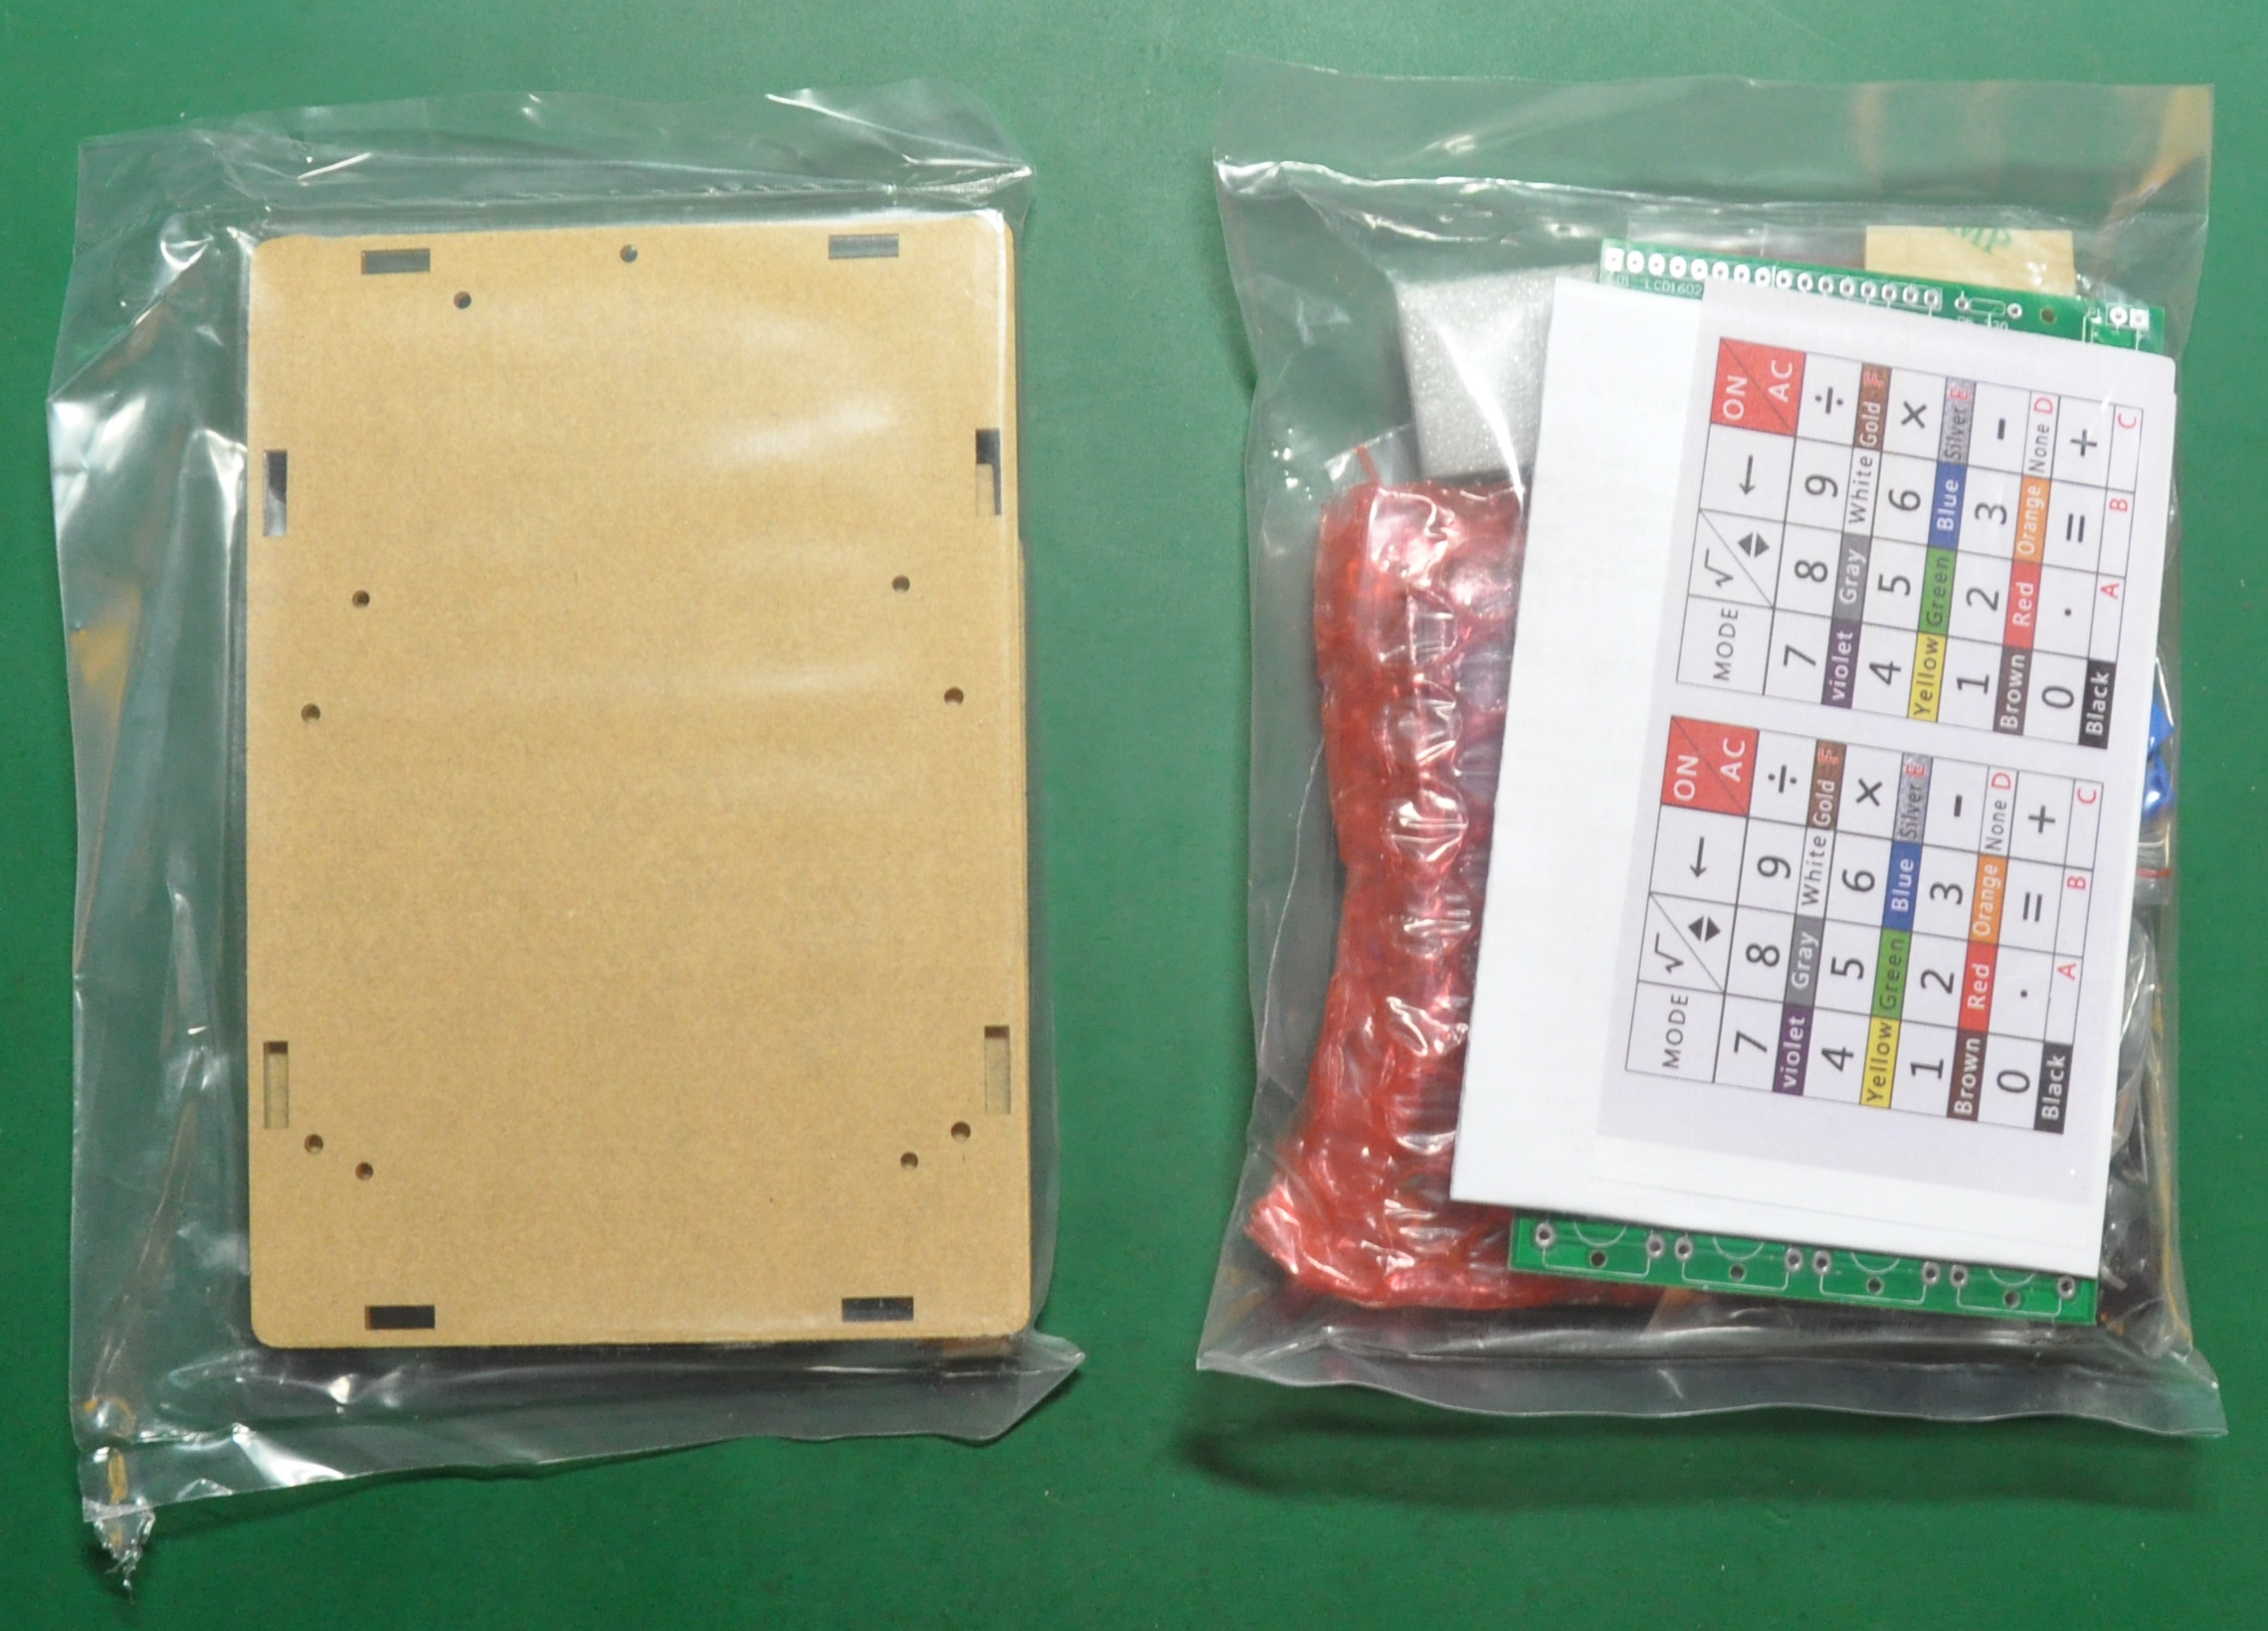
In this part, there is the components, the PCB, and the key cover with labels.
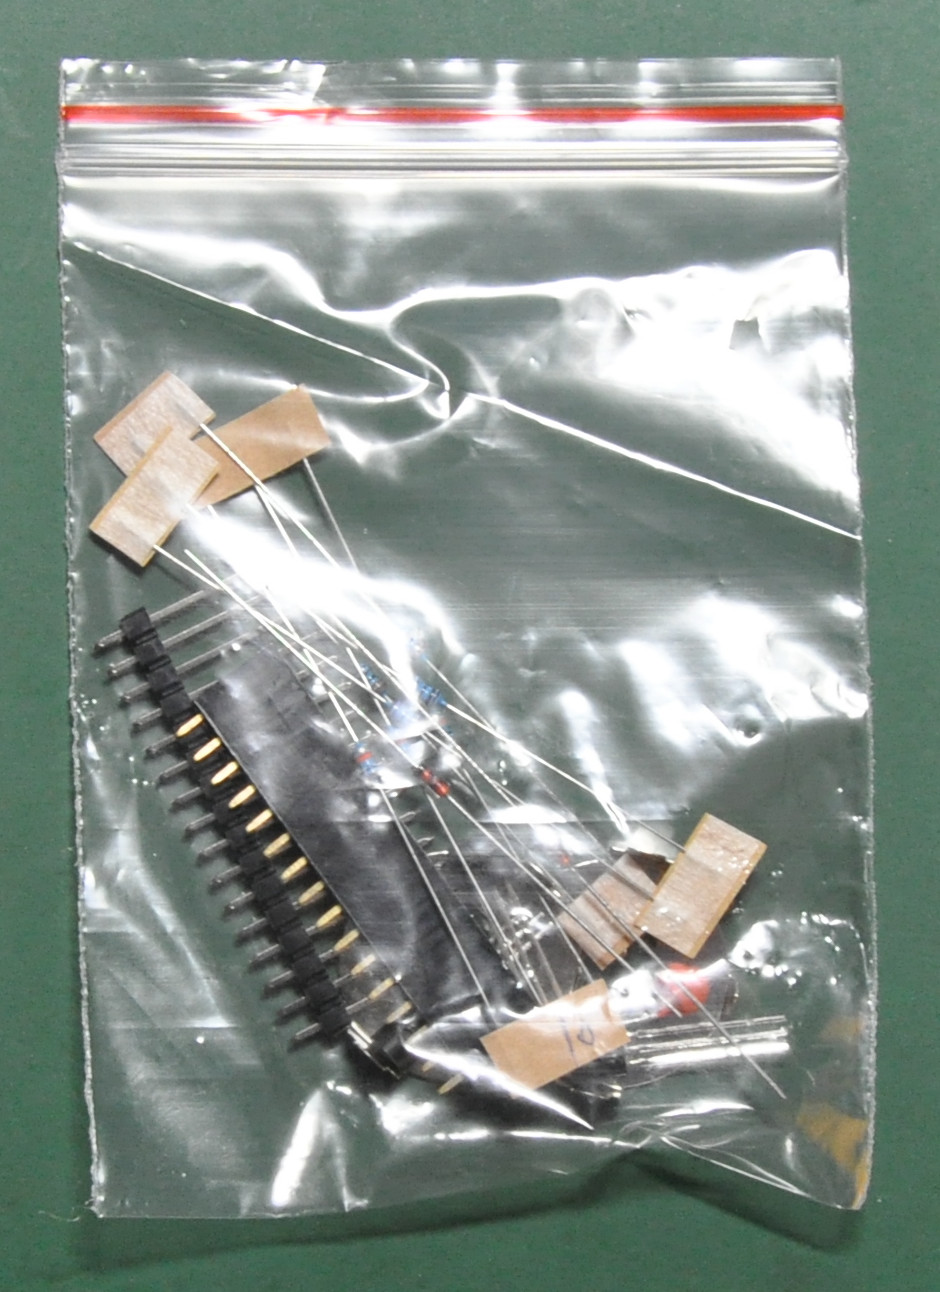
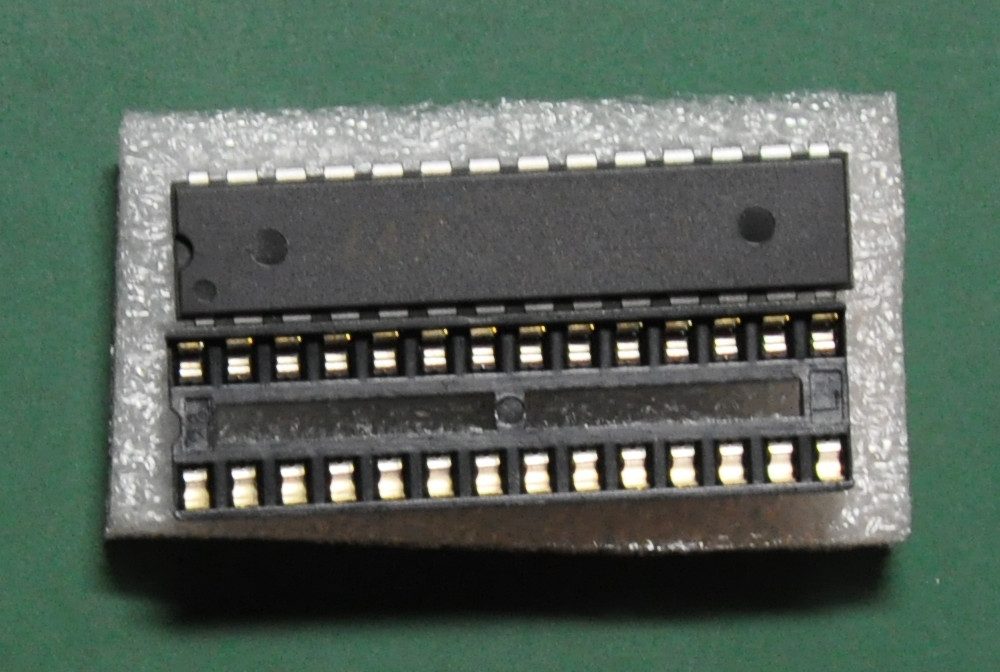
On the right side is the processor that is used to operate the calculator. Here is what in the parts package.
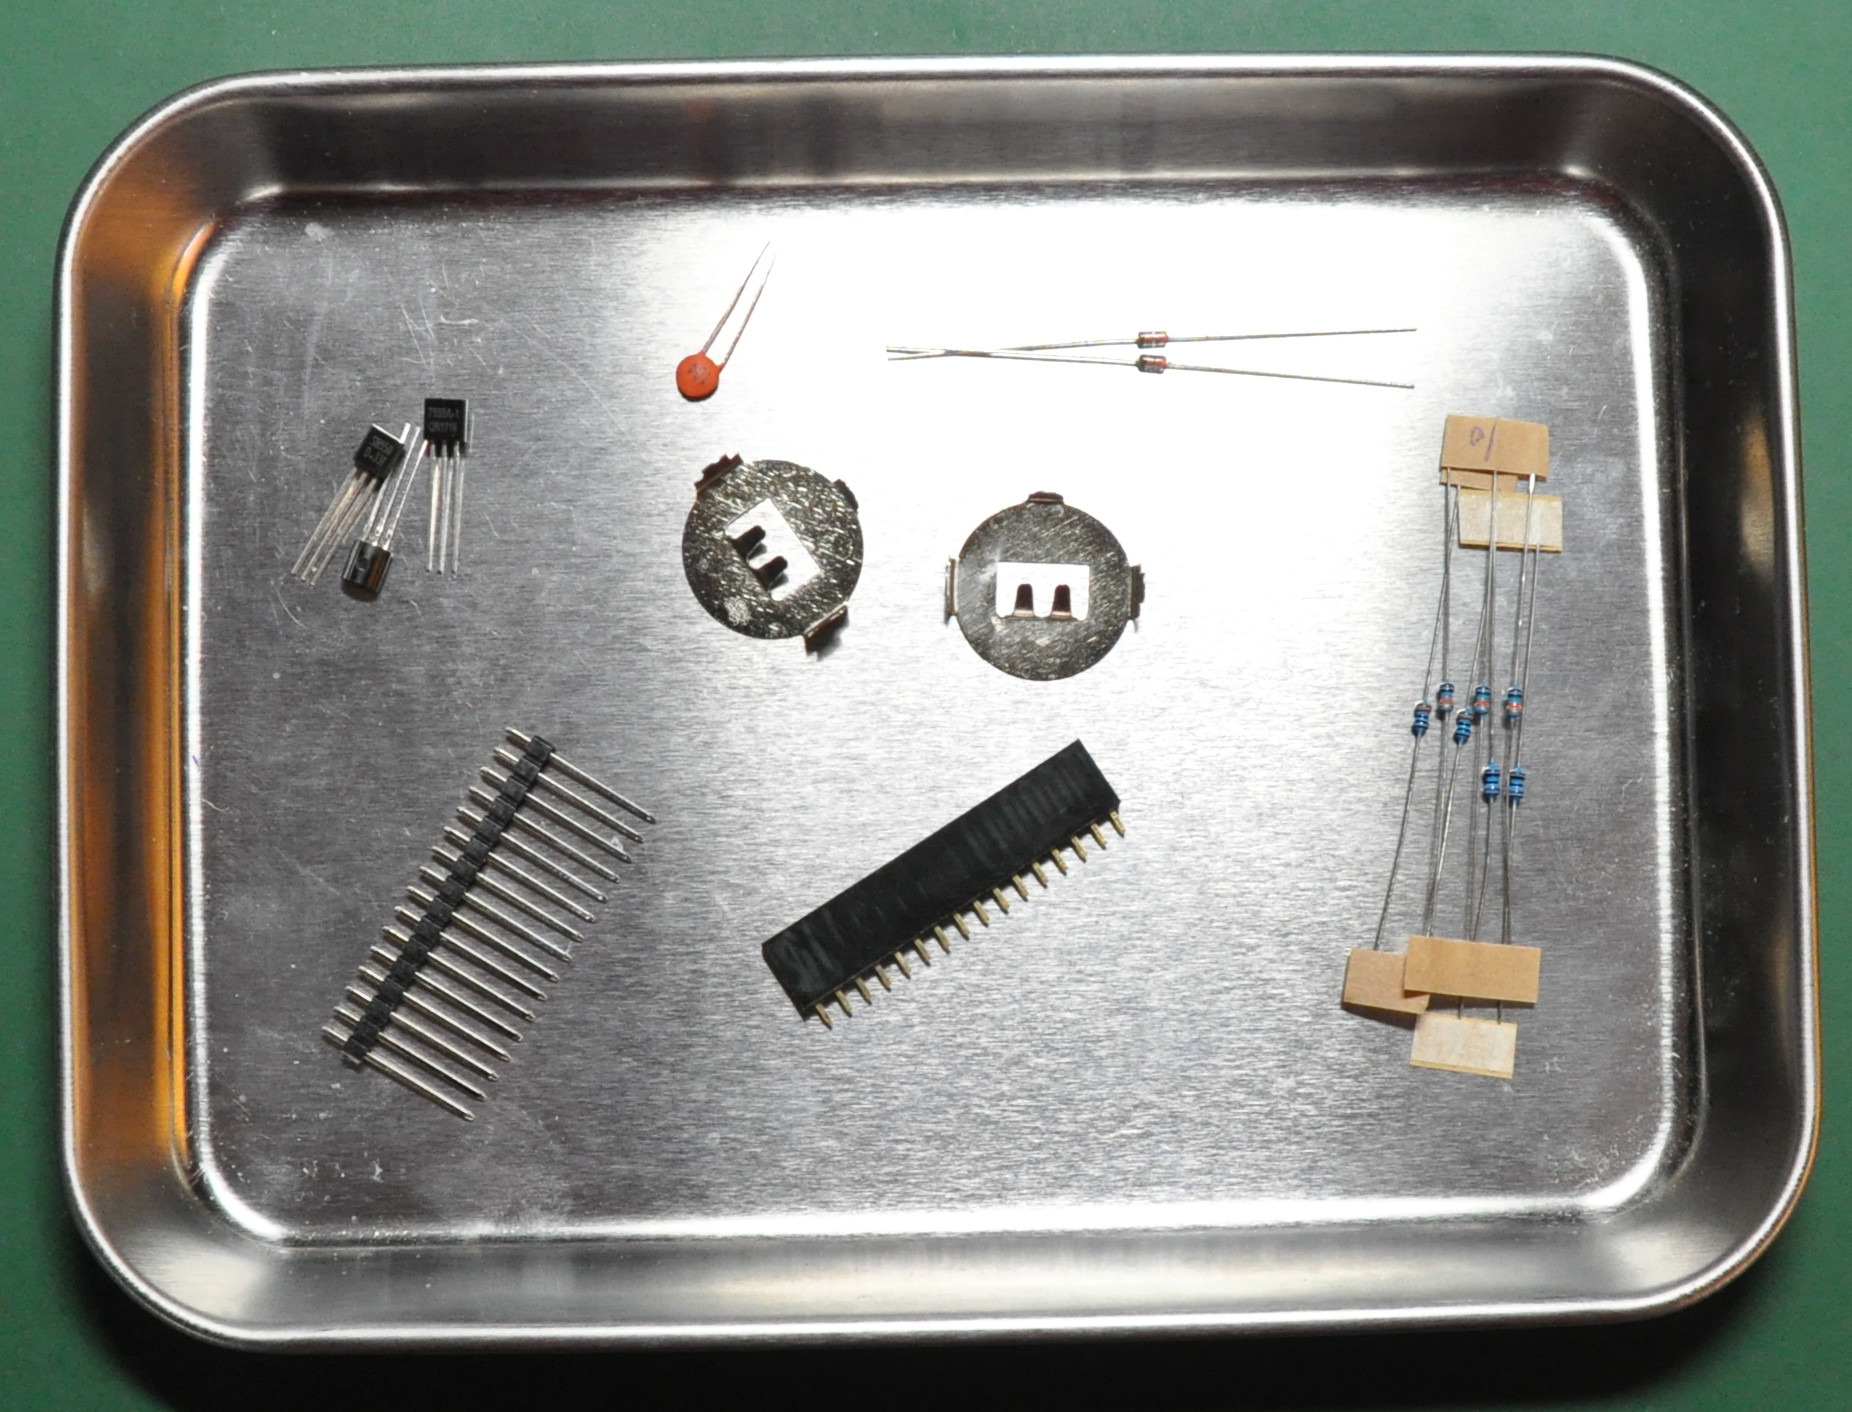
Looks like there is not much components to solder. Some resistors, capacitors, battery holders, a few transistors and sockets for the 16×2 character display.
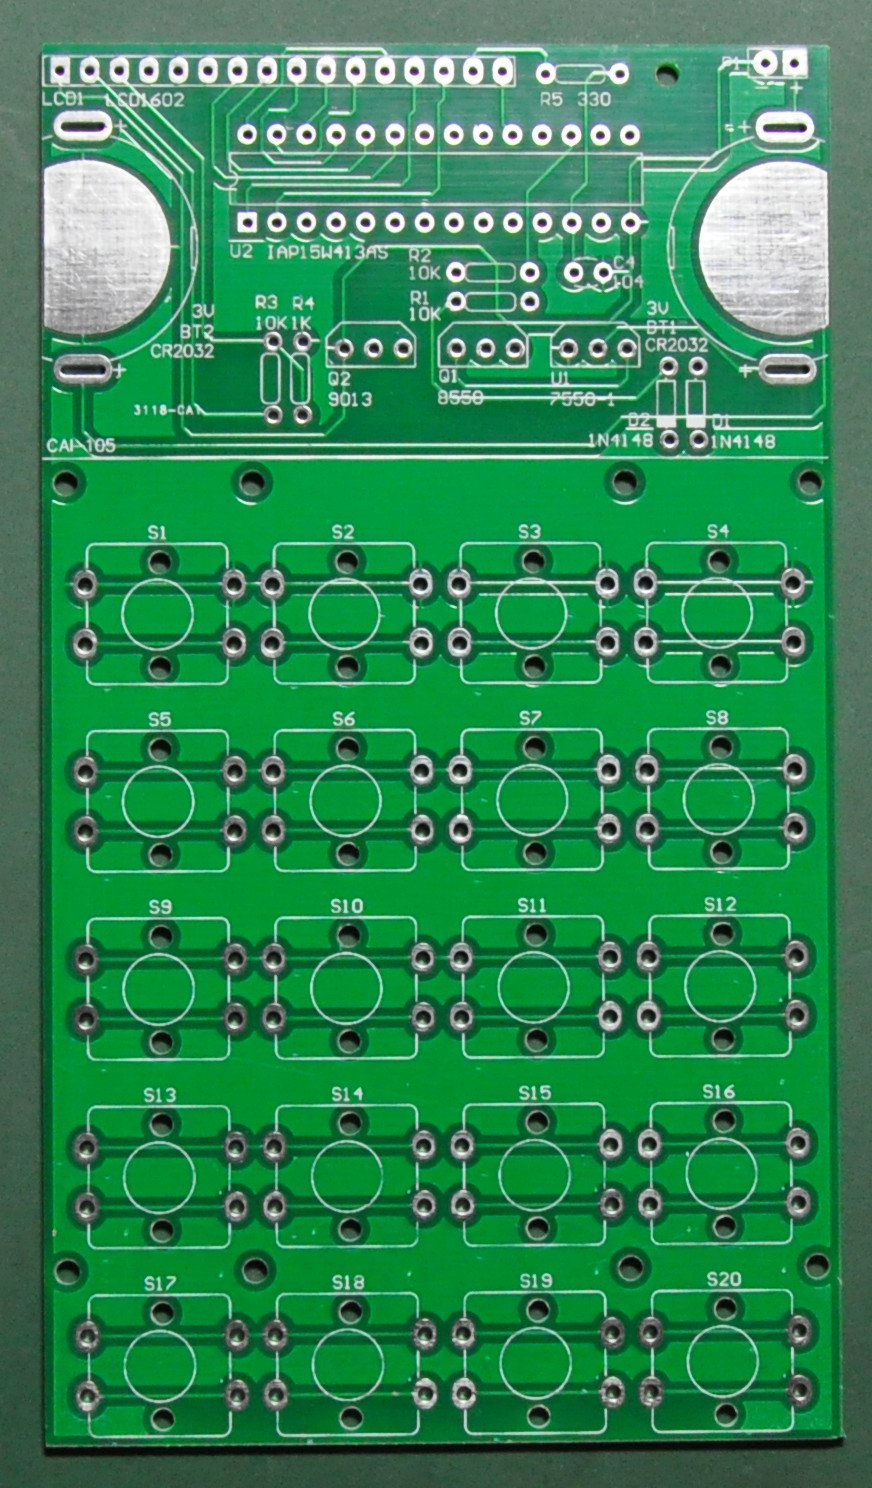
Above is the PCB included. It is a very nice PCB. As always, I cleaned up the PCB with alcohol before soldering.
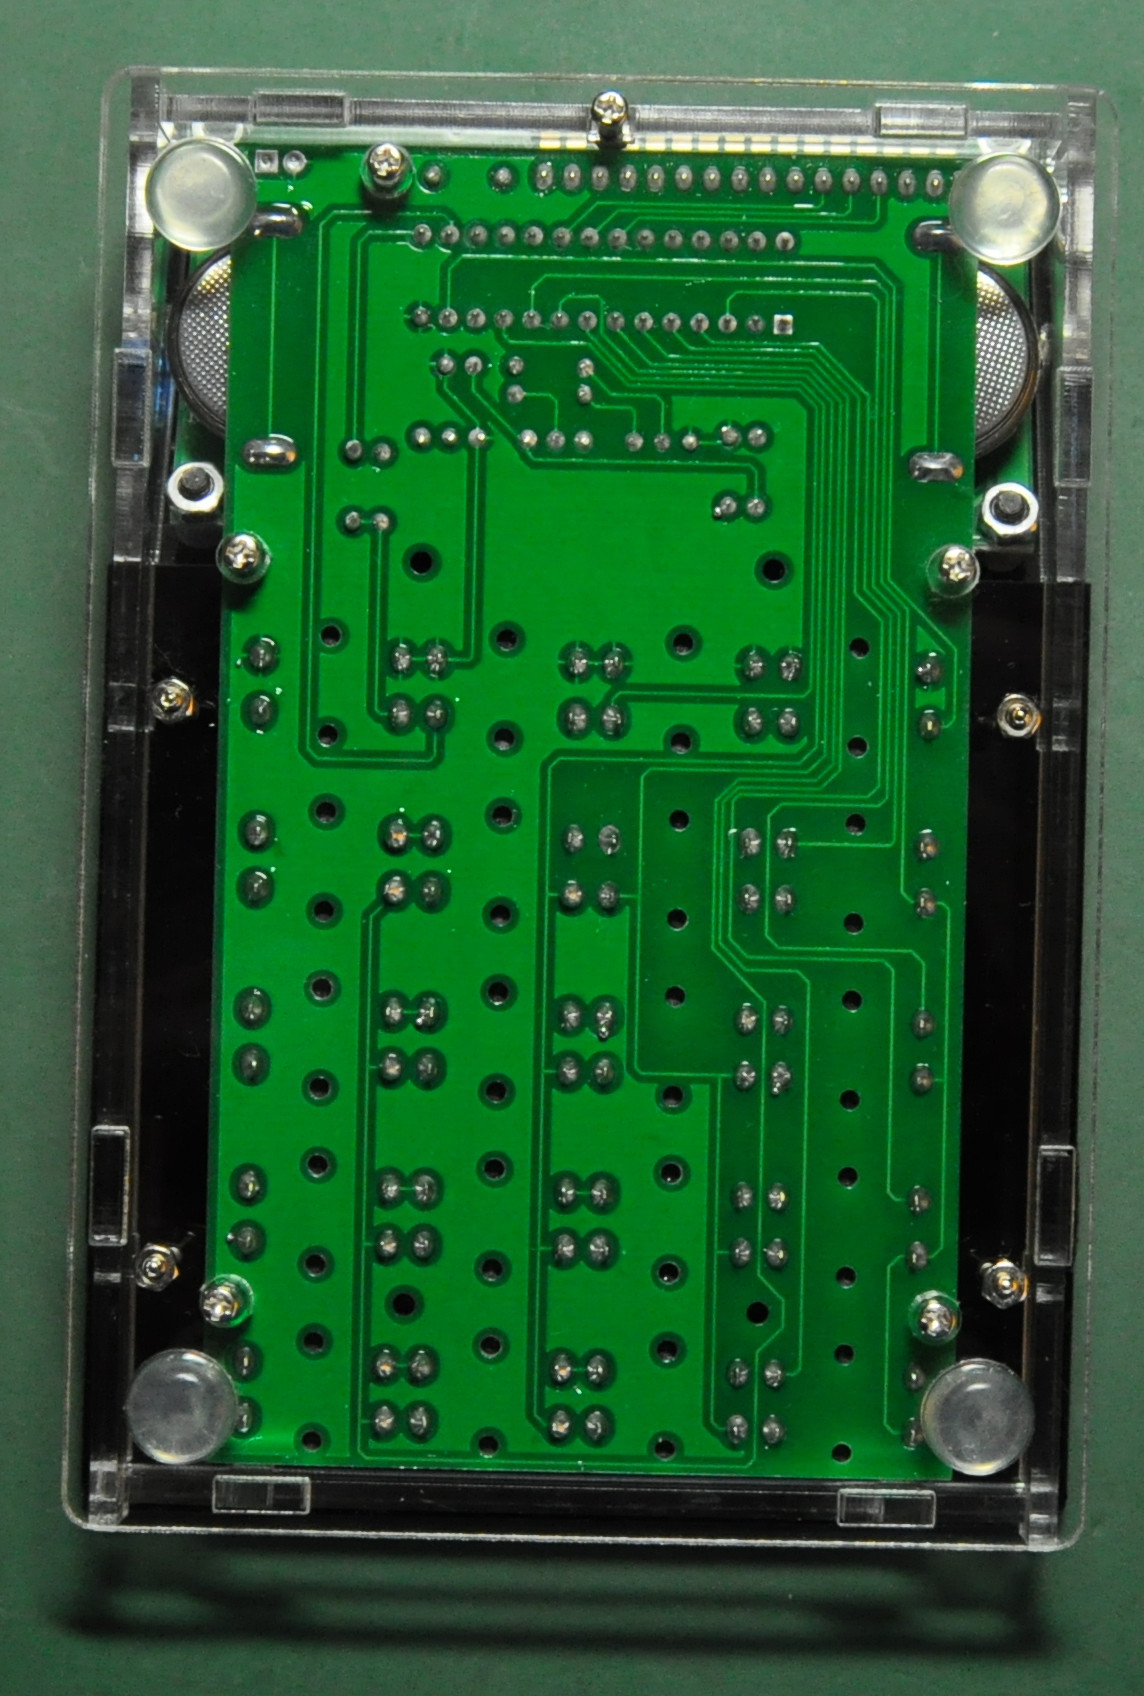
Here is the finished board.
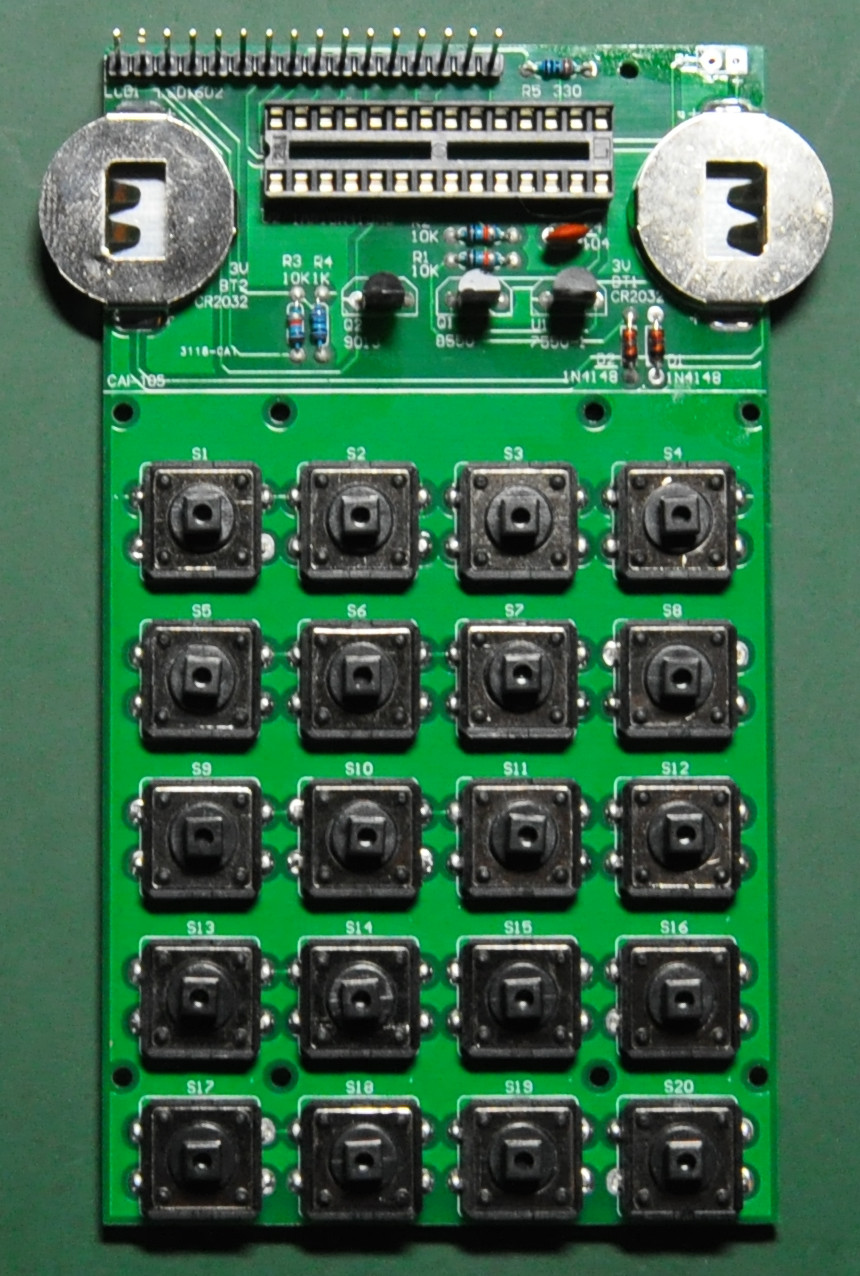
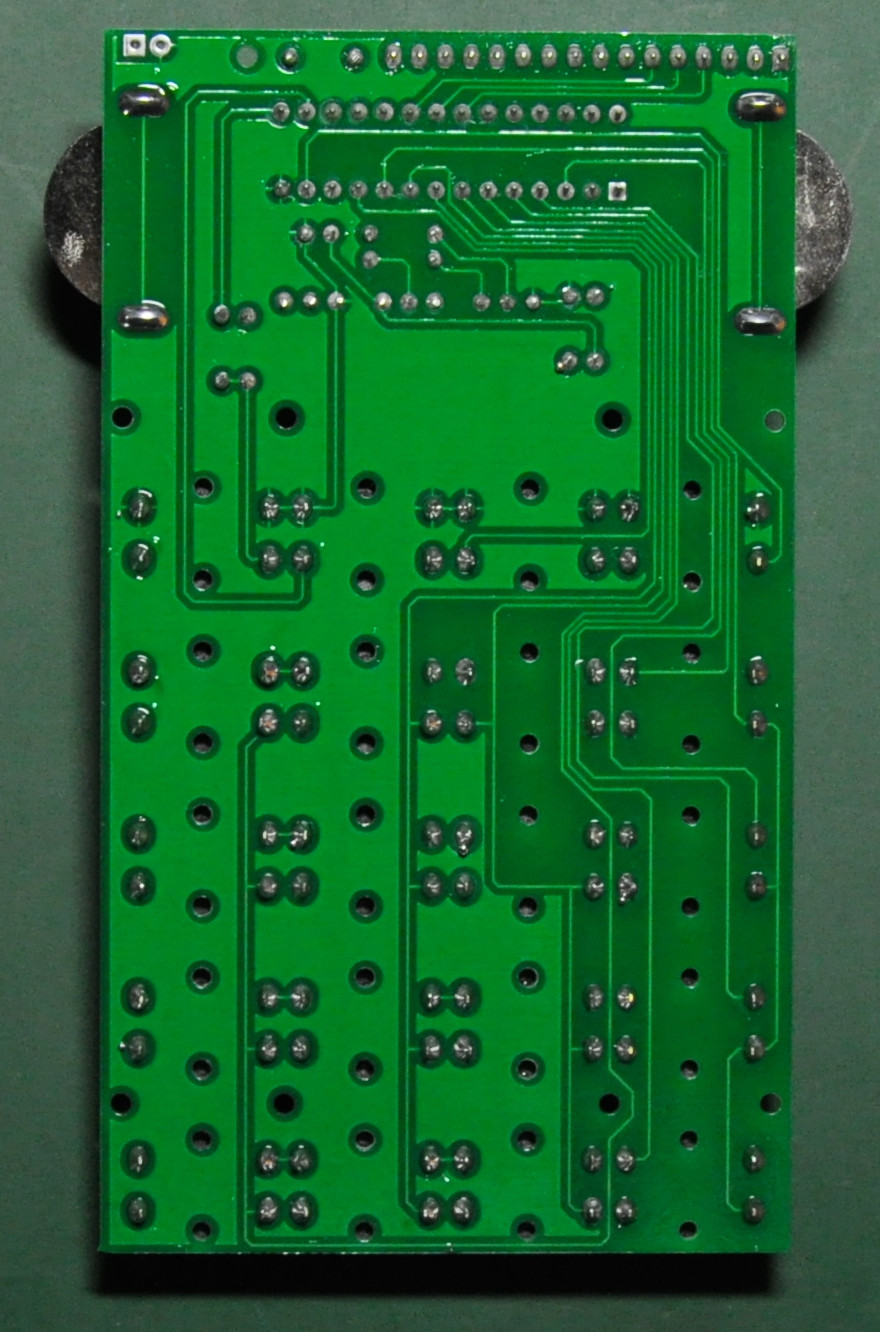
All the components seat well, I see that there is some problem to put together the display when we assemble the case later. It looks like we need to bend the connector pins in order to put in the case nicely.
After finished soldering, I washed the PCB with the flux remover, put the controller and batteries and make sure that it works properly. Next is the time to assemble the key caps and labels.
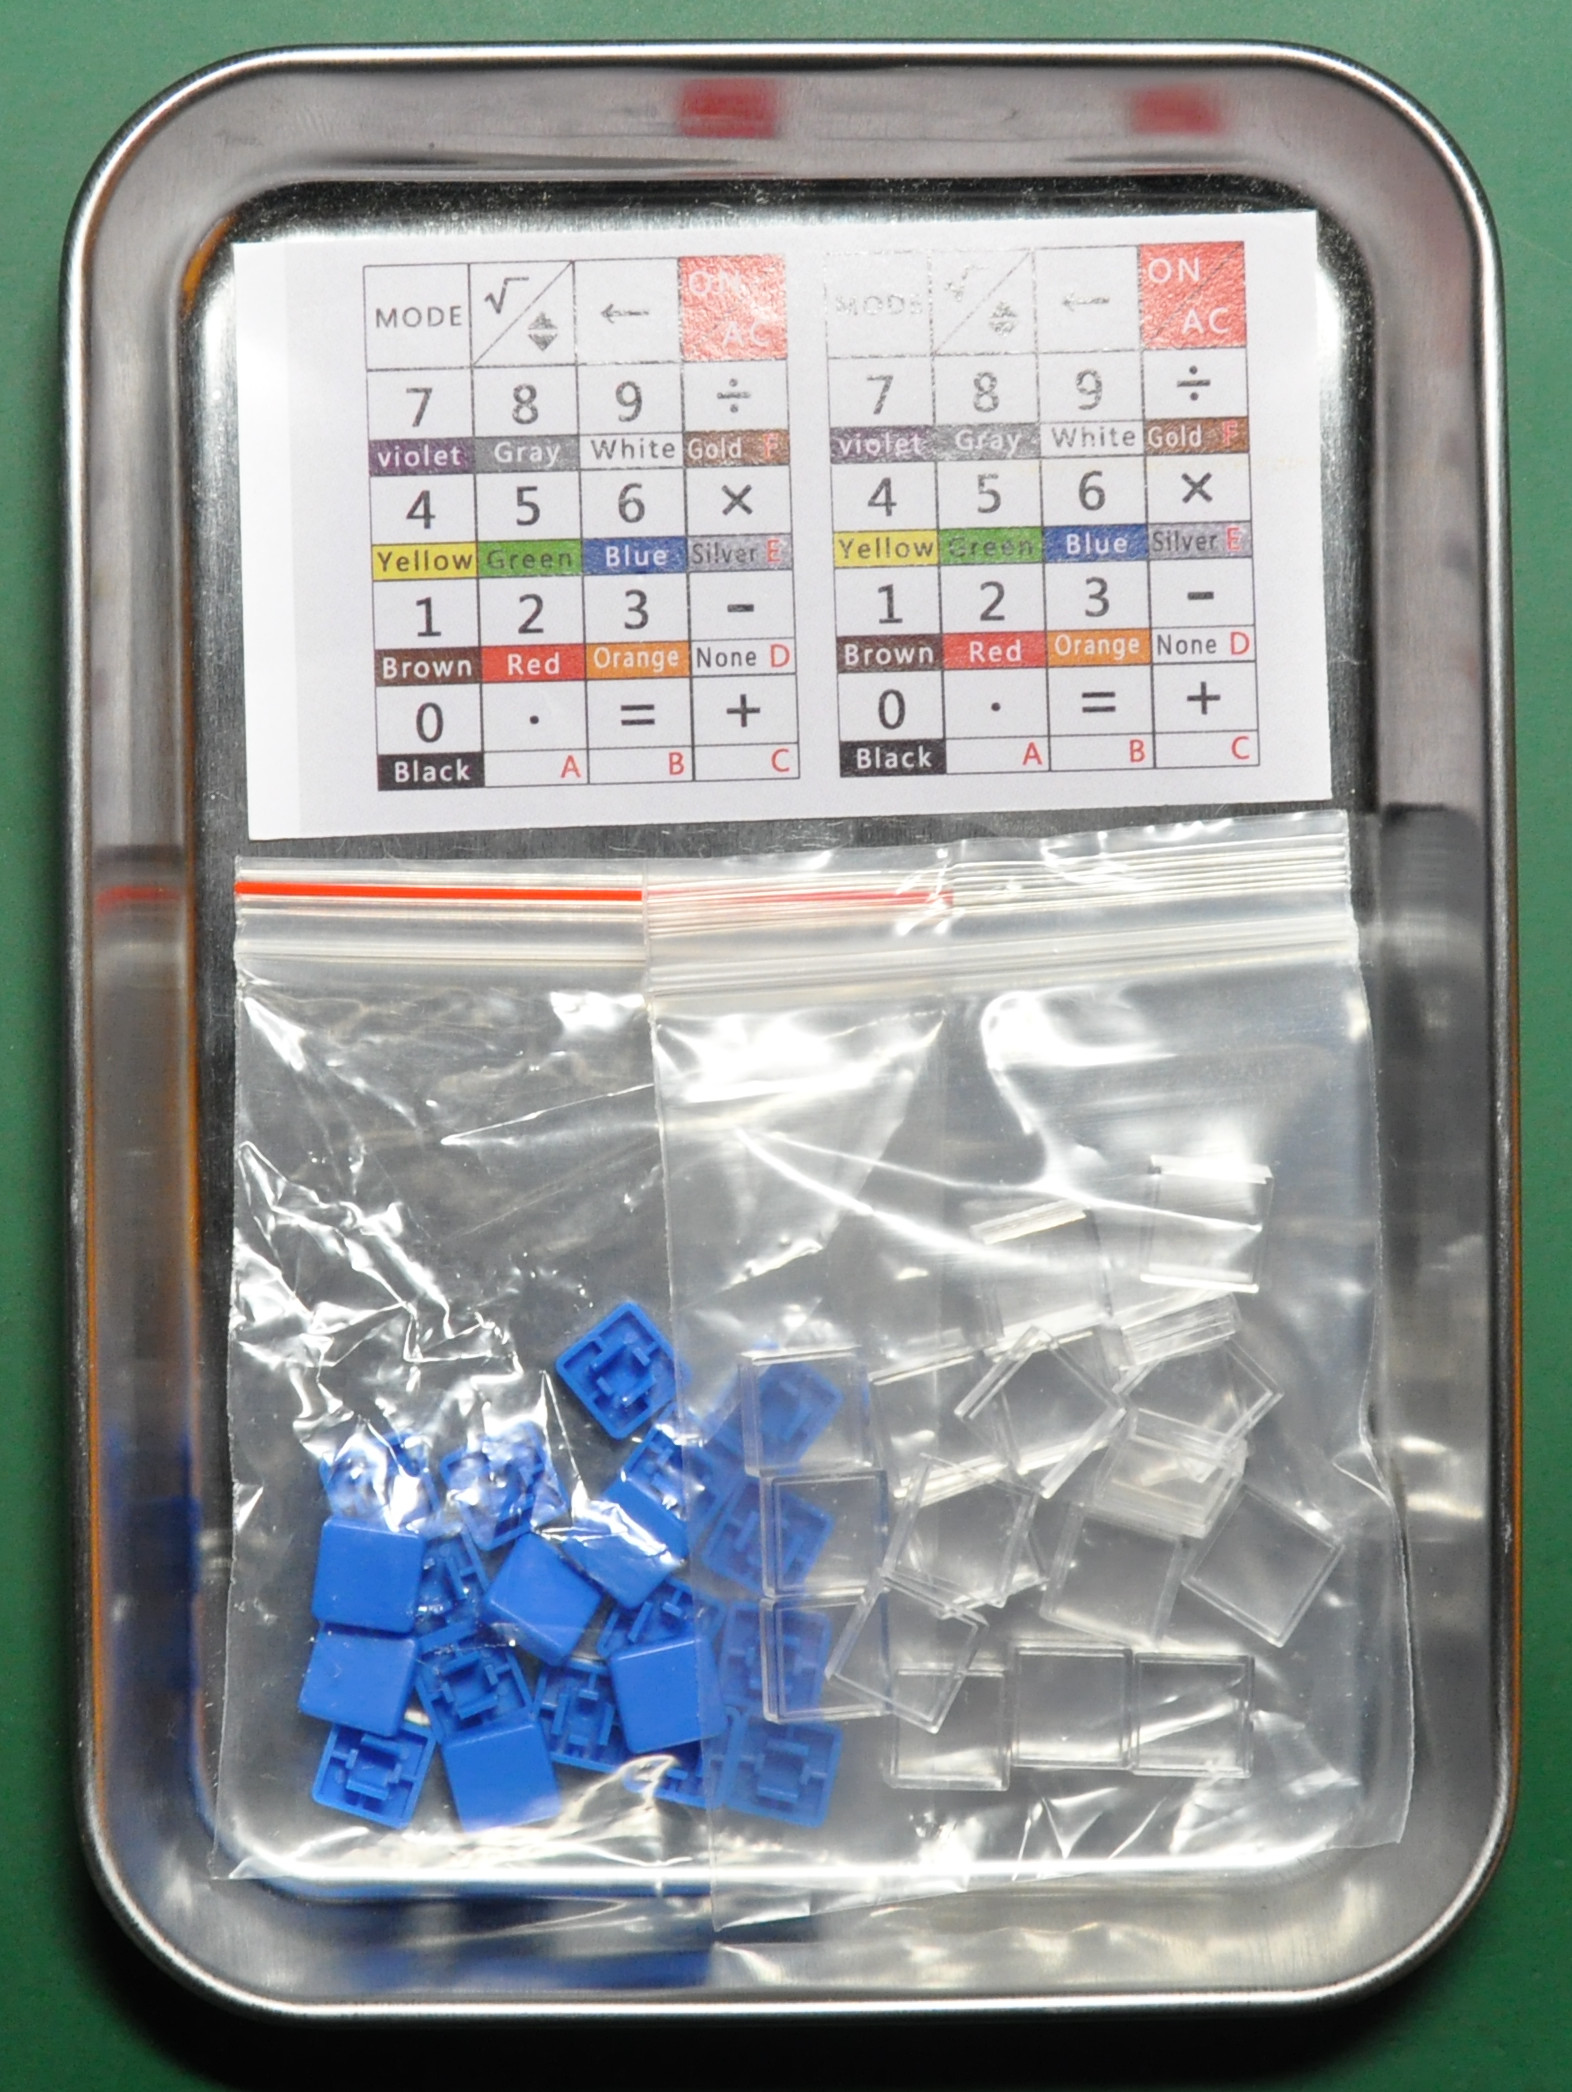
Here is the parts for the keycaps. It looks like we have to cut the labels nicely !
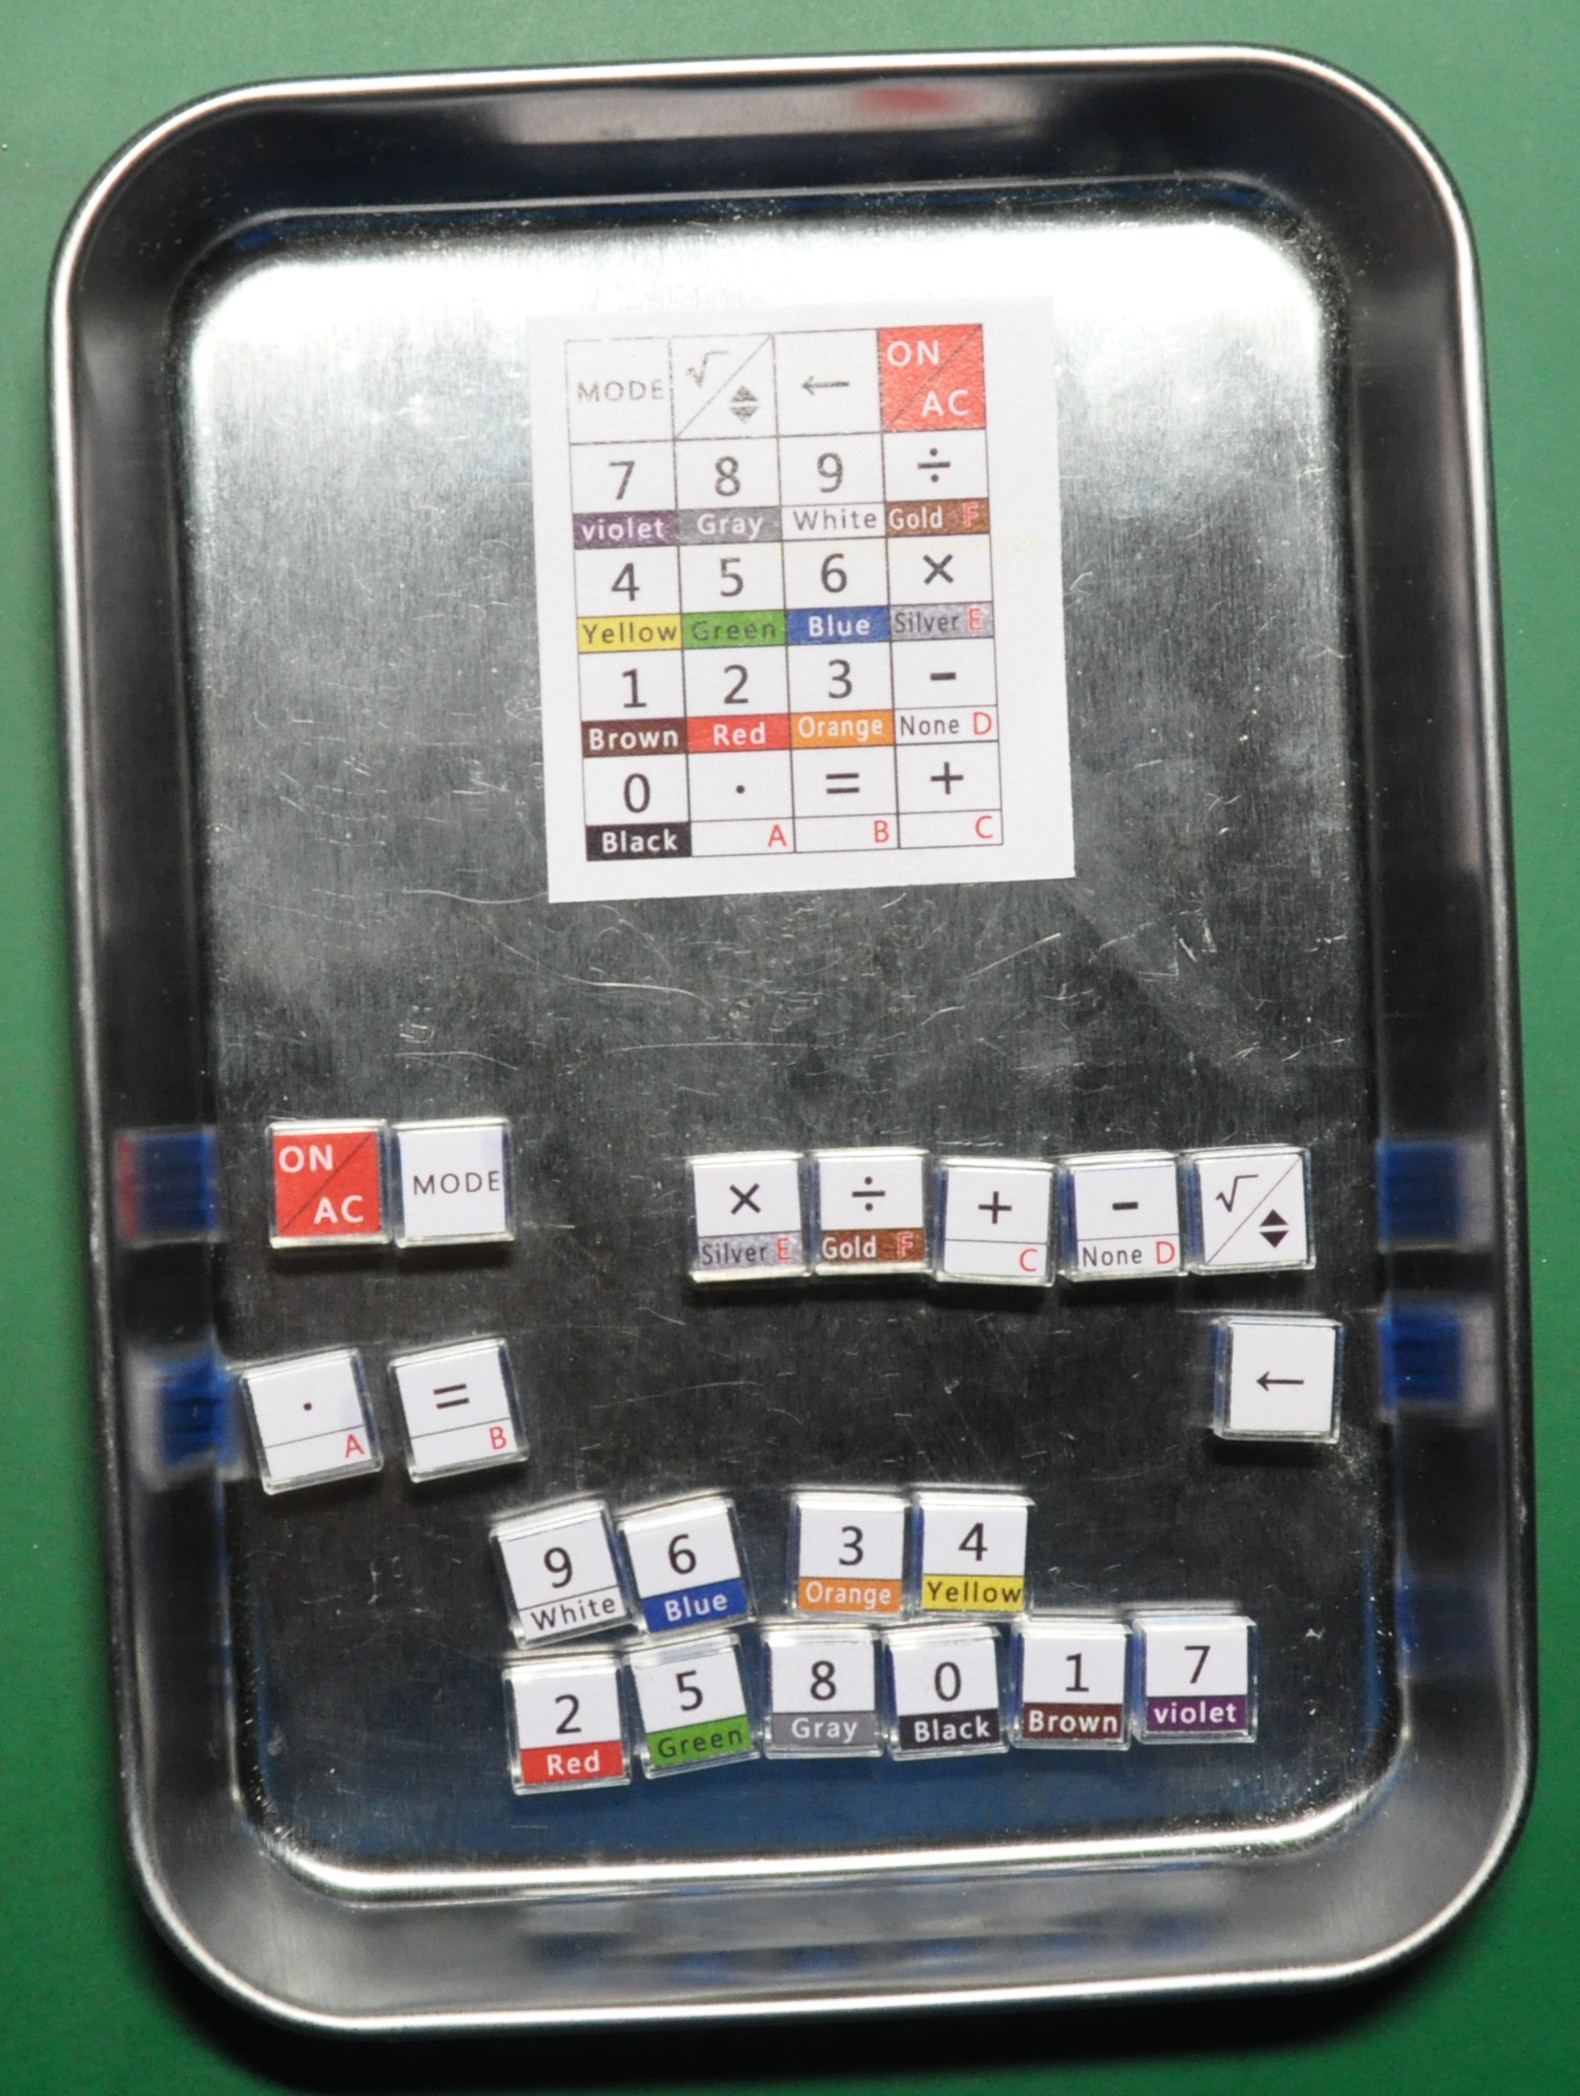
The kits included two piece of the labels, so I have just use one of them. I think they included two piece for backup, in case of wrong cutting of the labels.

Now it’s time to put together the case. I have bend the connector attached to the display so it match with the case.
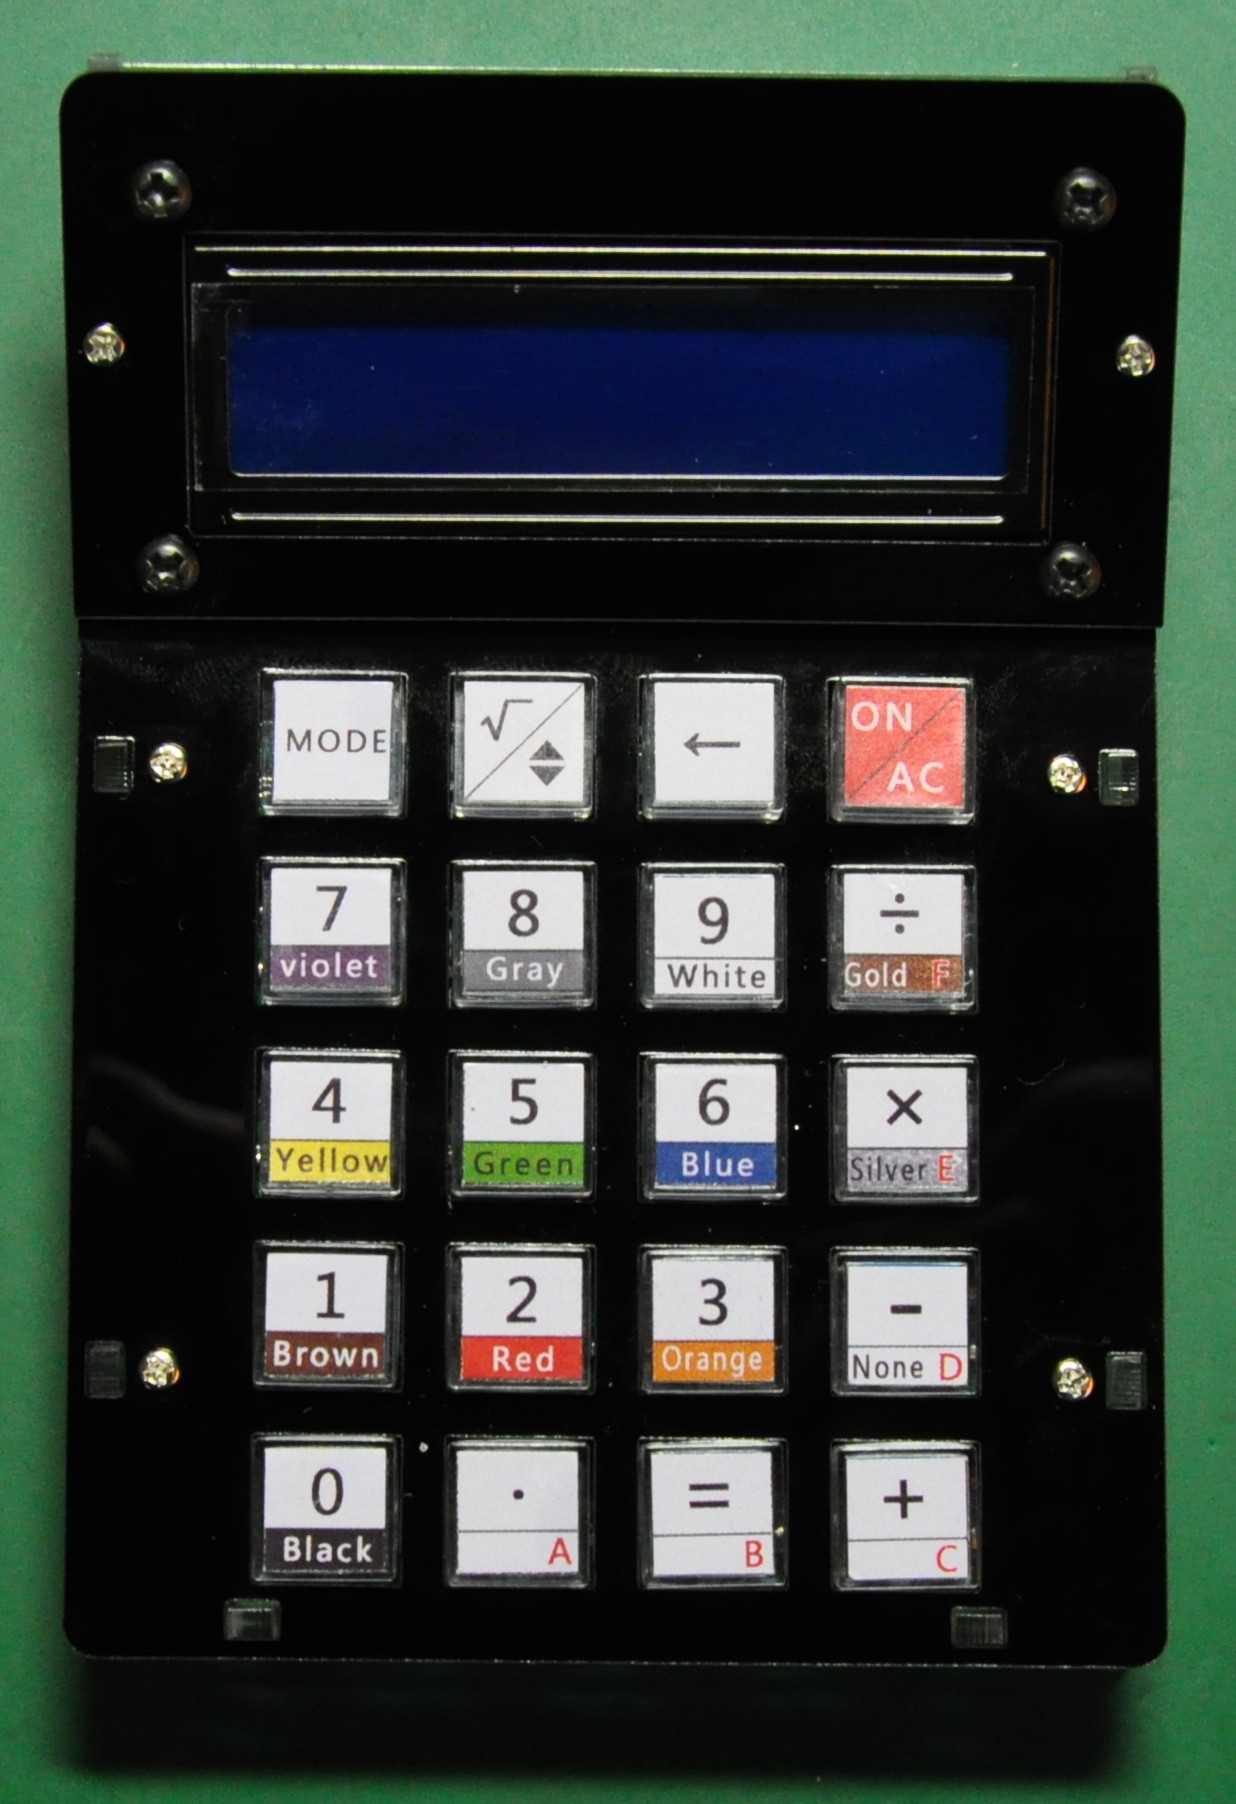
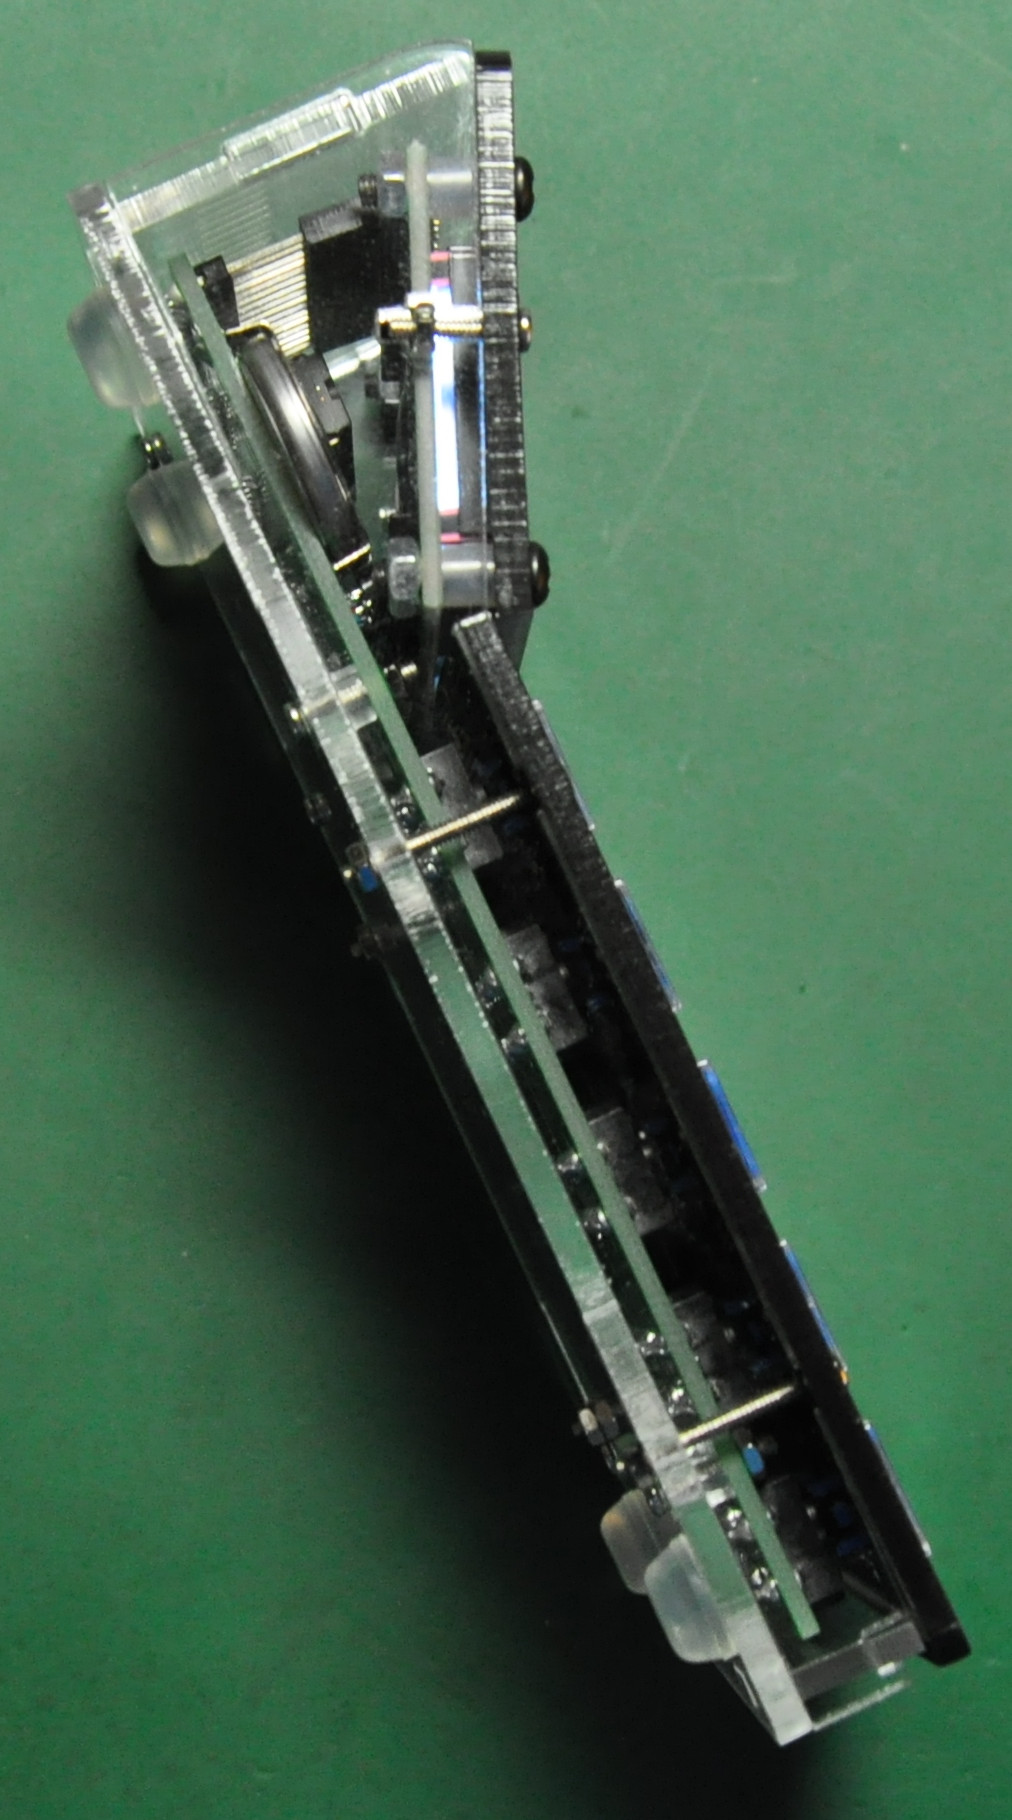
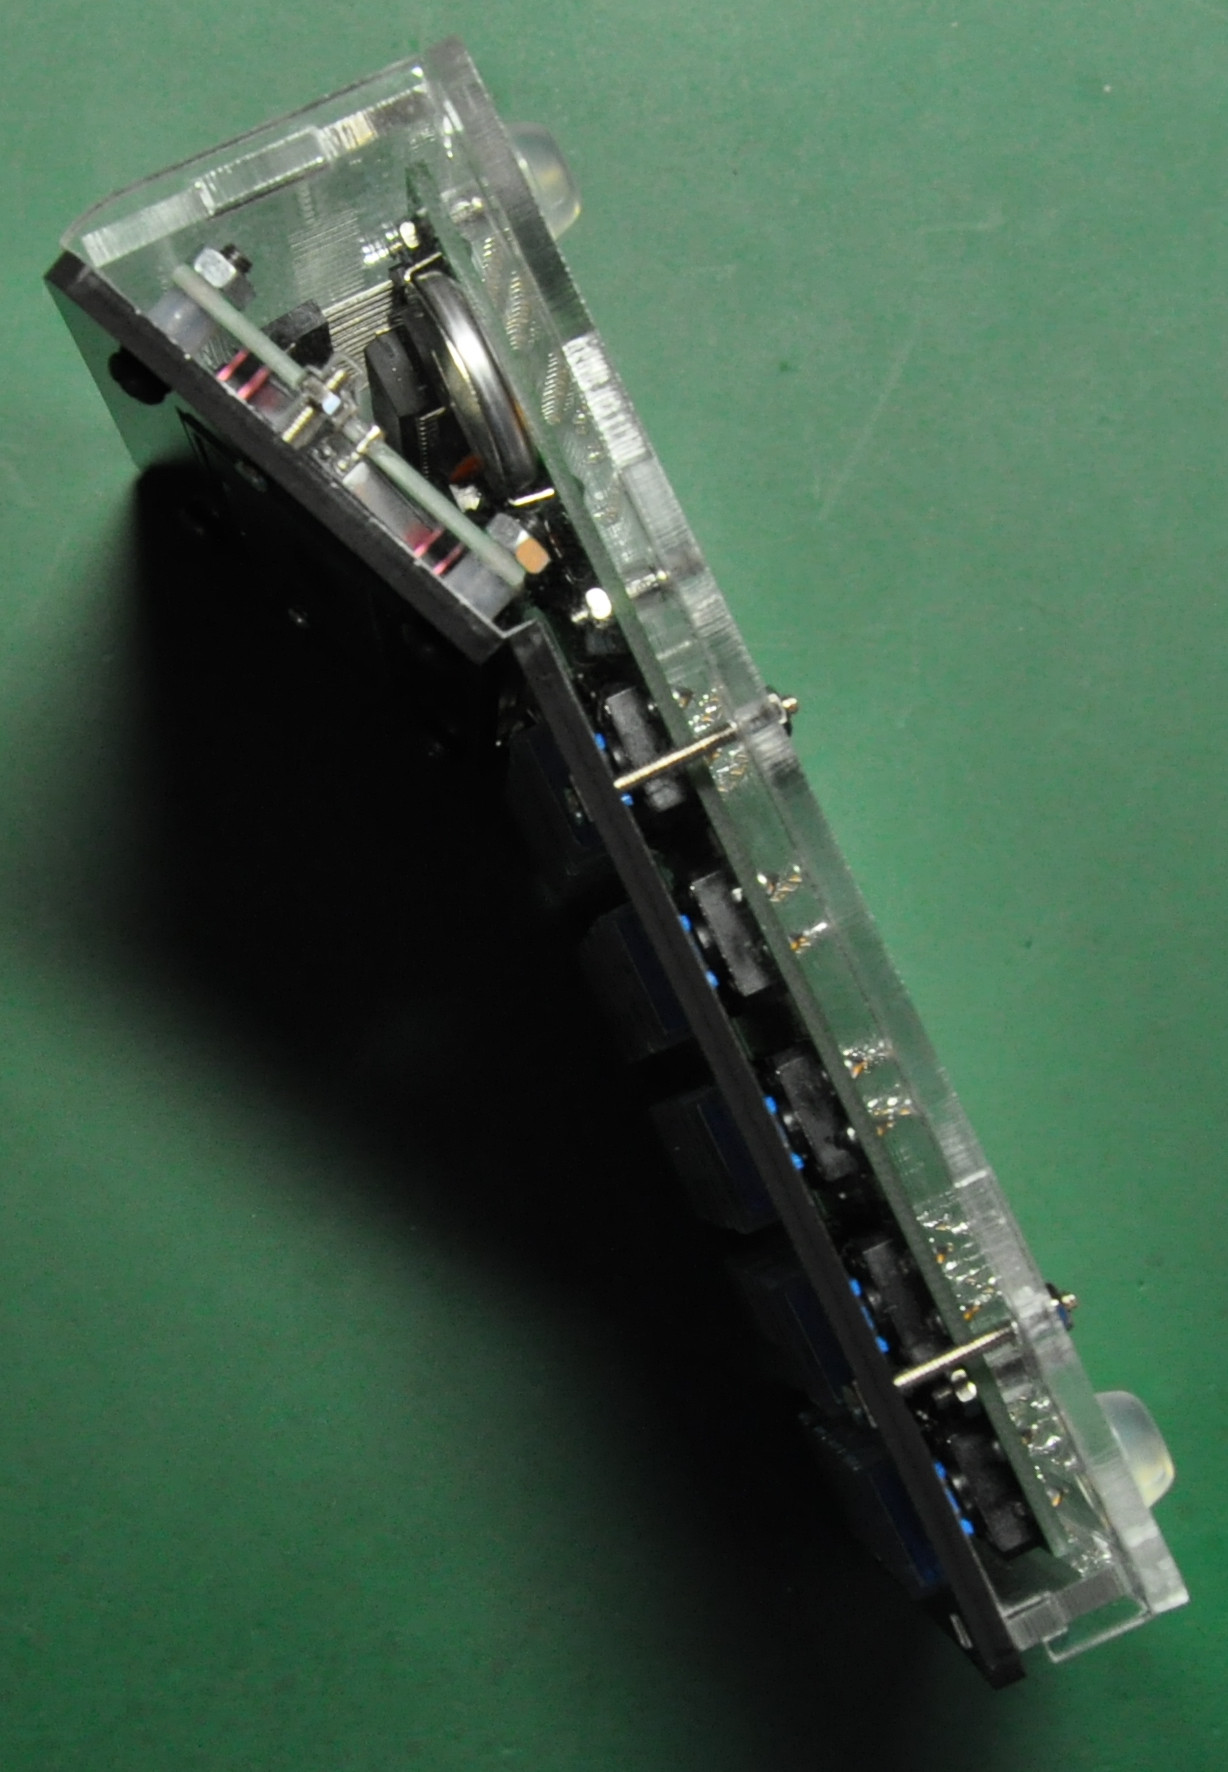
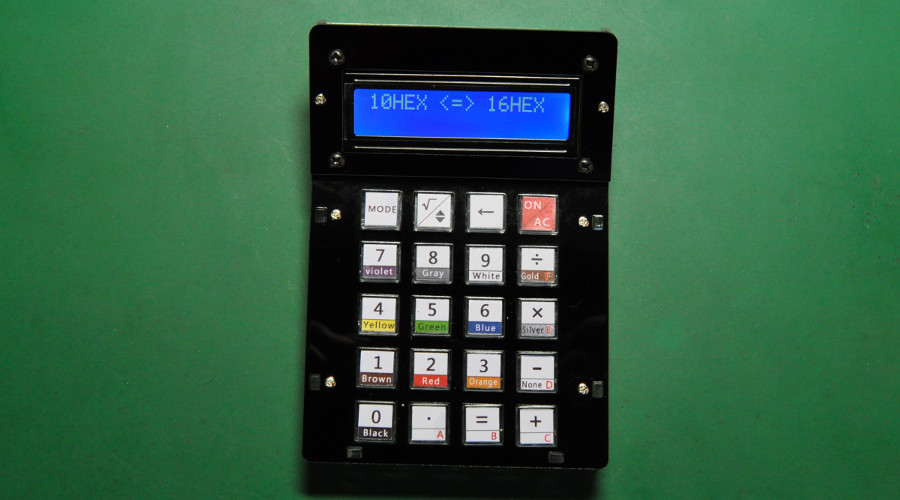
Here is the finished calculator. As you can see, I have bended the display connector to about 10 degree to match the case. Notice that we have to bend it properly as it will damage the display PCB.

Above is the calculator in action. I use this calculator everyday, it is very useful when I doing my hex to decimal calculation and the resistor calculation. And of course any calculation that we can do with a calculator !
I am very happy with the result and I think I will use this calculator in my daily work and learning. It also looks nice. Very good price for a nice calculator like this !
